Posts tagged Getting Started
Shot Stripes in 2012

100_2911
-April

Yes, shot cottons are great but did you know about their sibling shot cotton stripes? I have a thing about stripes, I heart them! These are some of the richest and most lovely additions to my ever growing stripe collection. I have heard many a quilter loving these stripes and using them as a staple in their quilts.  Looking ahead into 2012 an all stripe quilt is on my list.  I treated myself to a quarter yard of a dozen different shot stripes for inspiration. 

100_2902

Naturally there are other items on my 2012 list that I hope to get done. First on the list, FINISH two other quilts from years past(top is done, bottom is cut, batting is ready to go). More on that later. Second on the list, trying some new to me quilting (Elizabeth Hartman's Sparkle Punch Quilt).

I polled the staff here at bolt on what is on their 2012 list of things to sew. Here are a few answers: "Continue working on my son's never ending life quilt", "get into more apparel sewing" ,"Rooibos Dress". I won't name names.... perhaps we can hold the ladies to these aspirations at a later date. Have you started your list for 2012?


Read More
Easy Piecing

--Meredith

I spent an evening recently with one of the owners of MD, Michelle. In her living room was a stunning patchwork pillow. When I asked about it, she mentioned using Nancy Zieman's Lone Star template and techniques and how easy it was.

Trace 'n Creat Quilt templates

Oh yeah...I had been eyeing that at Bolt! Tucked over with rulers, this unassuming wonder had caught me eye recently. I was especially intrigued considering how gift-making season is upon us. I have to be honest about myself as a quilter--I'm no math wizard. In fact, I downright hate all that nitty-gritty technical thinking and planning. If someone can do the hard part (aka math), well then all the better. With such a traditional shape, I think playing around with highly graphic or super contemporary prints help make this seem fresh. Bolt still has some of Jay McCarroll's Habitat line, which I think would be totally awesome and I am super tempted to pick a few cuts to make another. Because it was, in fact, easy piecing.

To start playing around, I pulled some solids from my stash in various shades of red and purple. I used this Kaffe Fassett print to help inform the selection. People (including myself!) love his sense of color and pattern and the selection at the store right now does not disappoint! 

choosing fabrics

Deciding layout is key, and for this particular exercise I plan to either lay matching colors together or color-wheel them around the star. To be determined! I figured I could start with the intial piecing and decide later.

layout

There are multiple sizes on the templates so no need to choose one and trace. They're all right there every time! Cut a strip the dimension requested and use the template to mark and sub-cut into the size and shape needed.

marking using template

This "no pivoting" method means constructing only with straight lines. As with all quilting, seam allowance and proper pressing are key to ensuring seam lines meet up.

No pivot piecing

I'm hoping this will be worthy enough to give to either my sister-in-law or HER sister, both of whom I'll be seeing this holiday season. Maybe I'll love it so much, it'll stay on my couch! 

Read More
Fall for Felt Garland

--April

hanging leaves

Fall has always been my favorite season. Treat yourself to some holiday crafting while getting outside and enjoying the crisp weather!

I have been experimenting with felt and falling for it (pun intended!). We carry a wool/rayon blend felt in both pre-cut squares and by the yard in a 36" width.  This felt, because of its wool content, can be felted further to give it some more thickness and softness. Left unpressed, it has a Sherpa texture, similar to that of a crinkled leaf. To give your felt this texture, simply rinse under warm water, ring it out, and throw it in the dryer on high heat. One piece shrank about an inch in the length and almost three inches in the width. If you would like to do this with your felt I would suggest felting the pieces FIRST before you trace and cut out your leaves. Now on to the making!

This project was so much fun and brought out the inner child in me, running around filling my pockets full of leaves. Start by putting your kids to work collecting their favorites. If your crew is inquisitive, grab a book at the library on trees and make this a educational project with identification of leaves and trees.  What trees are native? What type of trees are planted in your neighborhood? After your walk collecting some nice shaped leaves, get tracing.  Use marker, chalk, or just pin the leaf right on to your felt piece. Cut them out and start sewing! 

cutting leaves

The garland was sewn together using Gutermann's invisible thread.  This thread is thin (almost like fishing line), strong, and truly invisible. It is such a great tool for crafting because there is no need to match thread colors with your project. I used a long straight stitch along the center length of the felt leaf shape.  Once you get to the edge of your leaf (and with your needle up and the presser foot lifted), pull both the top and the bobbin thread at the same time to create gaps between your leaves. When you go to your next leaf hold the threads taut so that your top thread is not shorter than the bobbin thread.

100_2900

I hung my garland in the window here at the shop right by the front door.  Every time someone walks in the whole thing sways and spins. It has an airy floating quality as if the leaves were falling from the tree. 

Some of the larger leaves were too heavy for the garland, so they are going into a fall center piece for the house.

felt leaves on table

Read More
Pair Up! Colette's new Clover

--Meredith

When I heard Colette was releasing a pants pattern, I was beyond excited. I couldn't wait to see what her design brain had thought up. I love its' understated simplicity; the go-to pant that you can wear with almost anything and make in any color. For Summer, turn them in shorts. For Winter, lengthen a smidge for boot-wearing. I'm excited to make my own pair (soon!) So I thought for this Pair Up!, I'd highlight our options here at Bolt in an attempt to narrow down and choose what my first (and I emphasize FIRST) my pair will be.

Colette's Clover pants

Sarai recommends the fiber content have a bit of stretch, between 1-3% lycra. I couldn't agree more. Because of their fit, that bit of give is going to make them more comfortable to wear and have the ability to retain their original shape more without stretching out. One could easily and successfully make this with a fabric with no lycra cotton. Still be sure, though, to choose one that has a bit of heft to it--nothing too lightweight. There is a raspberry cotton with no lycra here that I'd seriously like to use. Maybe an experiment for my second pair?

Denim is always a good choice and yes, we do have a bolt with stretch. One of my top contenders.

Stretch Denim

As we move into Fall, corduroy is a classic option. We have several colors but one, this grey, has stretch. What a great Fall color option!

Stretch Corduroy

Black is the new black. And this black is sueded. And stretch! This would make an absolute stunner of a pant. My humble photo does not do it justice; you've got to see and touch it to get the full effect. 

Sueded Stretch Cotton

And last but not least, we have a selection of mid-weight apparel cotton. Some have a lycra content and some don't so be sure to check the bolt or ask one of us Bolt ladies. The earlier-stated raspberry cotton falls into the no-stretch category but here are some that are stretch. I'm especially tempted by the turquoise. Then I think, "Can I pull this off?" I'm certain some of you can!

Stretch Cottons

(I tried to get the most accurate color representation in the photo. The top bolt is definitely more navy than purple and the bottom is an olive khaki that would be a great basic.)


Read More
Goodies from the Remnant Bin

--Meredith

When I walked in the store the other day, something caught my eye in the remnant bins. You know...the ones right in front full of little twill-wrapped squares of fabric goodness? That are 15-20% off?

Remnant Bins

Yep, those. I kept pulling out some amazing treasures.

This grey linen is so soft; with the extra width, there's plenty here for a skirt. And I just loved Denyse Schmidt's voiles for Greenfield Hill. Wouldn't Colette Pattern's new blouse, Jasmine, be lovely in it?!

Remnant Bin-Linen & Denyse Schmidt

I bought some of Jay McCarroll's Habitat already and continue to be enamored with this pixelated print. There's almost 2 yards here!

Remnant Bin-Jay McCarroll

Or this home dec weight mod fruit Alexander Henry?

Remnant Bin-Alexander Henry

Hey--another Denyse Schmidt voile. I love the Art Deco inspired design. 

Remnant Bin-Denyse Schmidt

And a Anna Maria Horner voile from her line, Innocent Crush. 

Remnant Bin-Anna Maria Horner

And more--bamboo blend knit, usable bits of interfacing, shot cottons, & wools! You should see for yourself. I couldn't resist; these came home with me.

Meredith's Remnant Bin Treasures

This floral Joel Dewberry is gone now, but there are still several prints from that collection here and they are gorgeous! And although black was not one of my Fall Palette Challenge colors, it does look great with everything (rationalizing). This J Crew Black Cotton Seersucker will be a great pencil skirt! I'm thinking Naughty Secretary Skirt from the book, Sew Everything Workshop. I was so inspired, I went ahead and picked up the printed bias and invisible zipper necessary to get right to work on it.

Humble beginnings of a pencil skirt

And don't forget about Sewing for Boys! The author, Shelly Figueroa of Patterns by Figgy's, will be doing a free book signing at Modern Domestic as a part of the Friday Night Sew-cial tonight at 6:00pm. And check back here tomorrow for our stop on her blog tour with a review and book giveaway!

Read More
Fall Palette Challenge & Fall Sorbetto

--Meredith

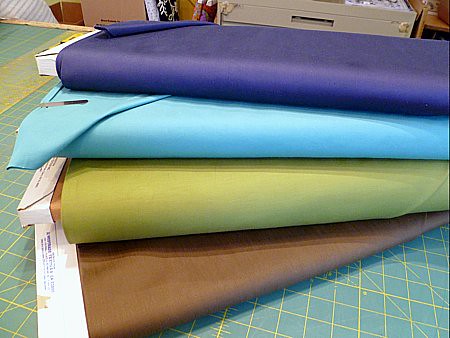
I'm a little late getting started (I wasn't sure if I could find time) but I've decided to jump head first into Colette Pattern's Fall Palette Challenge. You can read a little bit more about it here but to summarize, one is tasked to pick a color palette of approximately 5-6 colors and stitch up some wardrobe goodness. I participated in her previous Spring Palette Challenge and found her philosophy entirely true. I consider my closet--what I've got a lot of, what I have little or nothing of, what I personally like to wear, what colors I wear alot of--and plan what items I'd like to bring in. It encourages you to be thoughtful about your selection and responsible for one's consumption of disposable fashion. I'm on a mission to make my entire wardrobe...I'm not there yet. But I'm working on it! 

I thought I'd share my Fall Palette quest with you, Bolt readers, and you would keep me in line and moving forward. I'm feeling ambitious yet realistic. Well, maybe just crazy.

Fall Palette Challenge

--Colette's new patterns, Peony (a boatneck dress, loving!)

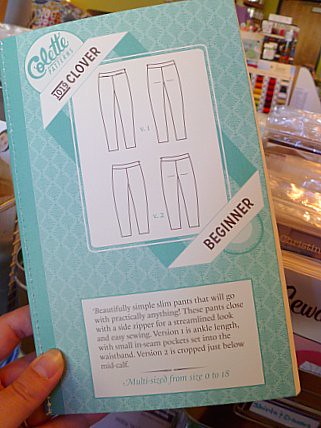
--and Clover (cigarette pants!) These should be available any day now.

--Sorbetto (Colette's free pattern) with the addition of cap sleeves

--A pencil skirt from Sew Everything Workshop (or a color-blocked gathered full skirt...I can't decide)

--Knit set consisting of a shrug, scarf, and leg warmers (all of which I'll be showing you how to do!)

--Maybe a Fall version of Colette's Crepe wrap dress. In denim!


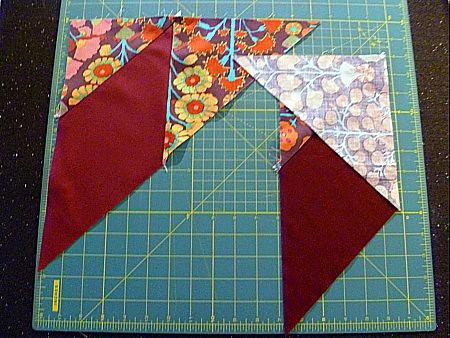
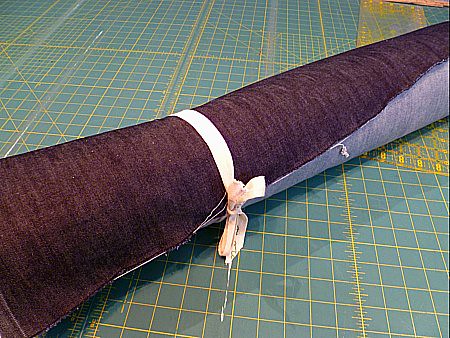
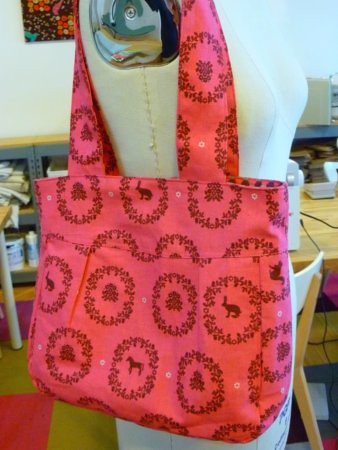
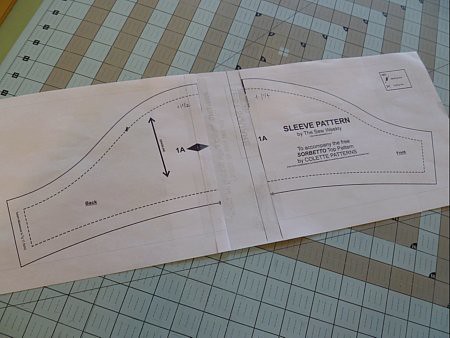
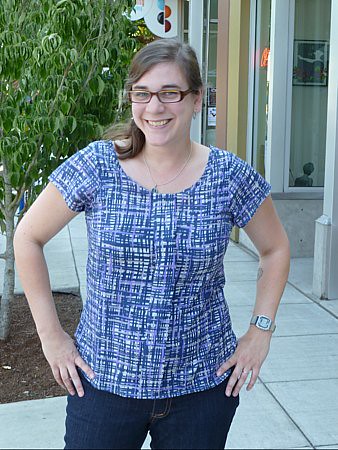
First up, my Fall Sorbetto. I printed this oh-so-helpful free sleeve download specifically drafted for this top. Thank you, Mena and Claire! She does state there is no size mentioned so I assumed I would need to alter it a little bit. I used your standard slash & spread flat pattern technique so I could maintain the integrity of the original shape at the underarm. I cut at the shoulder seam notch since I could see there was more to the back than the front. Don't forget there is seam allowance at the shoulder seams of the original tank, so you won't need to add it as much. Be sure to measure the sleeve opening to make sure you add in (or remove) the proper number of inches. I cut a sz. 14 in the Sorbetto and added in 2 1/8" to my sleeve.

slash and spread, flat pattern alteration

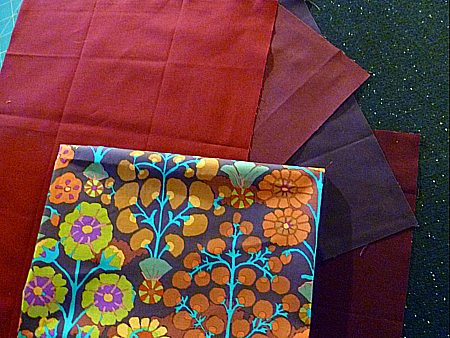
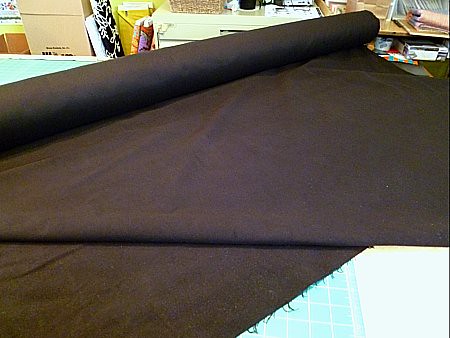
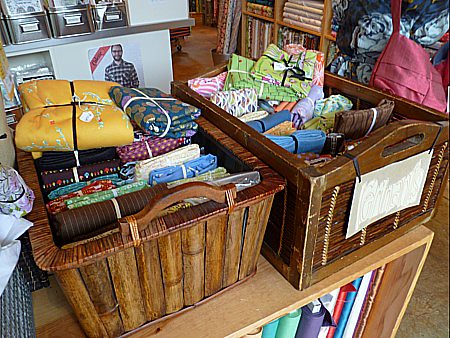
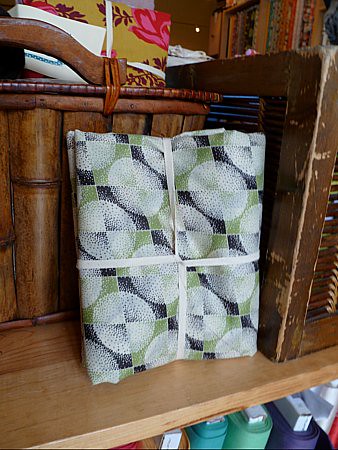
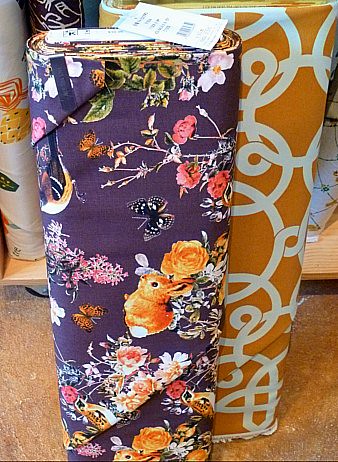
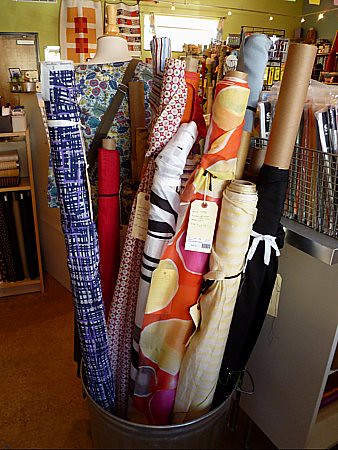
I chose this purple and blue crosshatch print in a cotton/silk blend that I've had my eye on hanging out in the silk bin. I'm a sucker for a good crosshatch and I thought the blend would be good for our gentle transistion into fall. It'll be great with a cardigan in November but still lightweight enough to wear through September. Now that I have an excuse and project, the bolt gets to make a trip to the cutting counter.

silk and other fine fabrics at Bolt

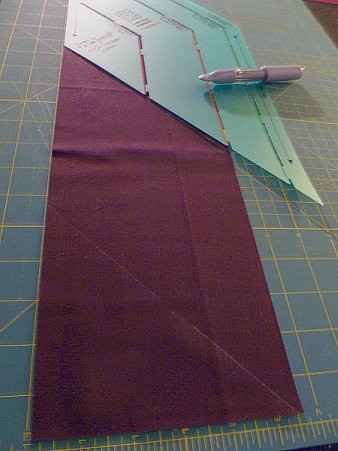
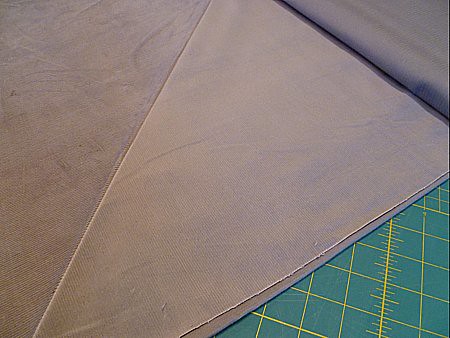
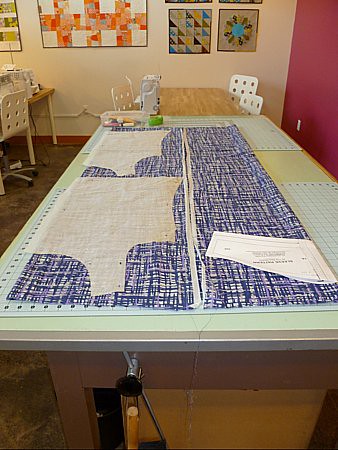
Even though I was adding sleeves, the yardage was wider than I've used before and April and I thought I could get my sleeves and binding out of 1 1/2 yds. We were right! I did want to maximize yardage for that very reason and you can see here how I folded it to do so.

laying out the Sorbetto

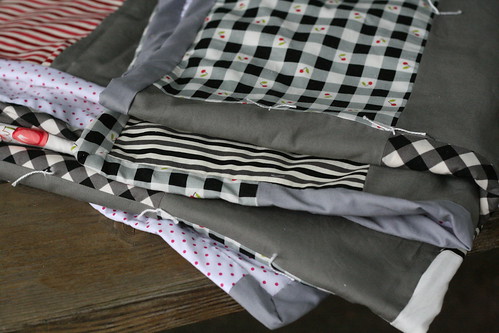
Then a little stitch here, serge there, bias tape maker here, hem there and voila. I feel like I'm off to a good start!

Fall Sorbetto

If you're interested in doing the Fall Palette Challenge with me, you're welcome to join in the fun on the forum Sarai set up for just such things. Choose as many or as little garments as you'd like!

Read More
Details in bag making

--Meredith

I personally think it's the small details like hardware that make your handmade bags professional looking. You can easily incorporate items like magnetic snap closures or purse feet, even when the pattern doesn't specifically request them. A lot of times these don't even require additional tools to install.

Case in point--a bag I started while I was still living in NYC. It's the Folklore Bag from the book One Yard Wonders. I unearthed it in a bin last week while I was finishing up Fall class samples for MD and thought to myself "While I may not be in love with this bag anymore, it won't do anybody any good sitting here in pieces. I should finish it!" Aren't you proud of me?

The next step was for me to stop by Bolt and pick up magnetic snap closures.

Handbag hardware

Even though I had used interfacing (some non-woven, non-fusible I had laying around and wanted to use up because it's not my fav), I reinforced the area with Stacey Shape-flex fusible interfacing (my actual fav) that I had cut into squares just large enough to surround the hardware, about an inch. I did double it for extra stability.

interfacing cut to fit closure area

The package suggests a small piece of cardboard but that seems like overkill to me. After marking the location, I pierced two holes with an awl and pushed the prongs through to the inside.

prongs inserted through pierced holes

Then placed the support over the prongs and bent them to either side.

magentic snap installed

All of this, of course, wants to happen before joining the exterior and lining together. Now I could zip around the top edge and turn my bag right side out through a hole I had left in the lining. A quick press and an topstitch around with my trusty #10 Edgestitch foot and my bag is finished.

Folklore Bag from One Yard Wonders Small details with big impressions

I think it's cute but a little small for my taste. I'm a big bag kind of lady. If I were to do another bag (or more appropriately WHEN I do another bag), I might stitch up one of these. Similar in shape and I like when the pattern calls for finding fabric combos.

Betz White, Isabella ToteAmy Butler, Birdie Sling Pink Chalk Studios, Mail Sack

Naturally, I couldn't help but pick out some fabric while I was there. Home-dec is great for bags because of its heavier weight. And I've totally been eyeing this amazingly bizarre bunny-in-flowers Kokka fabric we got in. I LOVE it, especially with the scroll-work Alexander Henry.

Second Bag, option 1. Kokka & Alexander Henry

Or this highly graphic Anna Maria Horner with the Echino dot?

Second bag, option 2. Anna Maria Horner & Echino.

As you can see, I'm obviously in a major plum and mustard phase right now because my second option is a little too similar to my first. I'm nothing if not consistent. 


Read More
Pair Up! Emmeline Apron (and reminder of machine giveaway at MD!)

--Meredith

Let's start with a pattern, the adorable Emmeline Apron from Sew Liberated

Pair Up! Emmeline Apron

Ever feel overwhelmed with options? Let's look at a few I put together.

1. The Organic Combo

Straight forward. Clean. Fresh. Happy. These are from Robert Kaufman's more modestly priced organic line.

Organic Combo-Emmeline Apron

2. The Sale Combo

I love the challenge of pairing from a limited pool. It keeps your wits about you. Here I played with warm and cool tones to be more dynamic. The two prints are from our sale section and the purple is a Shot Cotton. Good stuffs!

Sale Combo-Emmeline Apron

3. The Modern (aka Whimsical, aka You Paired What with What?!) Combo

This one actually turned out to be my favorite. It's bold, for sure, but something unexpected and balanced somehow. I almost used a solid but at the last minute changed my mind for something a little more playful. I tend to play a lot with pattern and color, especially for something lighthearted like an apron. Amy, Hannah and I had fun choosing what would go with the onion print. It's not just anything!

Modern Combo-Emmeline Apron

 **Also, just a friendly reminder that Modern Domestic is GIVING AWAY a BERNINA 215 sewing machine! This is a summer promotion that ends August 31st. Enter 3 ways--signing up for a class, attending a Friday Night Sewcial, or simple stop by and see what this great machines can offer and test one out. Some of you may have already done some (or all!) of these, but every class taken and every sewcial attended is another ticket in the raffle. There are still some exciting offerings so check them out!

Read More
1, 2, 3 Sew

Cover

Totes

--Melissa

We get a lot of questions about the sorts of books and patterns one should buy for a new sewist. We are so happy to be able to add Ellen Luckett Baker's 1,2,3 Sew: Build Your Skills With 33 Simple Projects to the growing list of primers for those of us finding our feet at the sewing machine, and those of us needing a little bit of fresh inspiration.

Ellen has divided her projects into chapters that each contain 3 skill building projects. The diagrams and instructions are clear and thorough and the photography has been beautifully shot and styled. It is straight forward enough for a beginner sewer at any age and is really the PERFECT book for giving along with a beginner sewing kit or sewing machine. For those of you who have your kids in one of Shelly's summer camps down at MD and want to keep your kid busy for the rest of the summer at home, get this book and a couple of yards of fabric, and you are all set.

Tiered Bag

I wanted to give the book a test run, so I chose the Tiered Bag pattern and a mid weight silk blend from the shop. The pattern calls for twill or canvas, and this would have been a far better choice for someone just gaining experience sewing bags. The silk is shifty and I managed to unravel the edges just by looking at it sideways. I had a feeling that I was in for a small challenge though, and was so pleased with both the pattern and the results. It only looks crooked in the picture. I promise. (The scribbles on the wall, however, are real.)

Tiered Bag

The pattern is well designed and contained a ton of great skill-building techniques that everyone needs to design and make their own bags: inserting lining, squaring off corners and sewing interior pockets. And with all of her patterns, Ellen offers suggestions and leaves room for modifications to make it uniquely yours. As with Jennifer Paganelli's Girl's World, I am impressed with the way that Chronicle is choosing to print up the pattern pieces. The individual projects are printed up separately on smaller sheets of quality pattern paper, so no tracing (unless you want to!) and everything fits back into its pocket.

Organizers

Would you like a copy? Chronicle has generously offered one up for one commenter (US addresses only please). Are you learning to sew? Do you need a little push in the skill-building department? Do you know someone who does? Are you a big fan of Ellen and all her work at The Long Thread? Let us know and we'll pull a name next week. Thanks Chronicle!

Read More
Getting Started: Bias Tape

Solid Coloured Bias Tape

Some of the Patterns

--Melissa

Chances are good that even if you haven't been sewing for very long, you still have a package or two of bias tape kicking around your home. It's a handy thing to have around: I've used mine for crafts, wrapping gifts, and in-a-pinch shoe laces. But what is bias tape really for?

Bias tape consists of woven fabric cut on the bias (or at a 45 degree angle) sewn together to form a long continuous strip. The raw edges are generally pressed down for a small seam allowance on each side, and then it is often pressed again in the middle to form "double fold" bias tape. When cutting woven fabric on the bias, you achieve a nice stretch, so that attaching it to curvy seams and edges creates a smooth finish. It's typically used as flat piping (or to cover corded piping), as a finish for interior seams, to create a finished hem, or as an arm or neck hole facing. Quilters often make their own to finish the edge of quilts-- though, I prefer to do a straight grain cut for quilt binding.

Some of the Print

Here at Bolt, we have made the transition from packaged bias tape to selling it by the yard. You can now purchase it in flexible amounts and it saves on packaging It used to be far more common to see packaged binding in a myriad of patterns and not only solid colours. Thankfully, manufacturers are moving back towards patterns! Of course, if we don't have exactly what you're looking for, it's easy-peasy to make your own. Clover makes a number of bias tape tools to help you get the exact seam allowance and to save your fingers from the hot iron.

Clover Bias Tape Makers

Here's a whole list of online tutorials to get you started making and using bias tape:

  • How to Make Bias Tape by one of our favourite local designers. The Colette blog also has some great tutorials on binding seams, and creating flat piping for the Ginger skirt. Heck, just search for "bias tape" on the blog and you'll quickly learn how to add a little Rouleau to your next garment.
  • The No Swearing Bias Tape Method by Miss Chicken. Amy also details creating continuous bias tape in her first book, Bend the Rules Sewing (a great project-based how-to book for folks getting their sewing start).
  • Karen creates beautiful interior seams for those of us with texture sensitivities or the desire to make heirloom quality clothing.

And a few posts where we profess our love for binding:

Napkins!
Softest Baby Blanket Ever
Party Bunting

Anna Maria Horner introduced patterned bias tape by the yard at Quilt Market in Salt Lake City. We put in an order for some and we'll let you know when it comes!

Read More
Getting Started: June Picnic Throw

June Picnic

In keeping with our series of project ideas for beginners, I give you the June Picnic Throw. It's a handy blanket measuring approximately 52" by 72", which is big enough to cover a small to medium picnic table or wrap up in at an outdoor concert. I love traditional gingham check for picnics-- especially red and white. This is a variation on that theme that is yelling for summer to come on over.

We're going to use:

  • 6 piece fat quarter pack. These prints all come from Henry Glass and Kaufman.
  • 2 yards of coordinating solids (the extra will be for binding)
  • 2 1/8 yard 54" or wider fabric. You can also piece the back from two 1 1/2 yard 44" inch or wider pieces of fabric.
  • You can choose whether or not you'd like to interline the throw with quilt batting (I did) or leave it on the thin side, which is just as nice for summer.
  • a skein of pearl cotton and a sharp needle with a large head. A curved upholstery need is handy but not necessary. 

IMG_8841

First off, cut your fat quarters into 18" square and then in half again. You'll now have 12 rectangles measure 9" by 18". Keep the scraps. We'll use them to piece the binding. Now cut 12 rectangles 9" by 18" out of the coordinating solid.

Placing right sides together, sew one print and one solid down the longest side. Repeat until they are all done. Press open all seams.

IMG_8844

Lay out your blocks. These blocks will now by 17 1/2" by 18" long and you can leave them this way, or you can trim them into 17 1/2" square blocks. If you trim them, you can lay them out by alternating their direction to create a more interesting pattern. Or! Keep them as rectangles (I did) and put them together how you would like them. At this point, I stand back and squint at the finished top from all angles. By squinting, you'll be able to see color and value distribution.

IMG_8885

Stack them in order and move them to your sewing machine. For this design, we want our points to match, and so, we're going to sew them together "end to end". Place a straight pin through both seam allowances, matching the points exactly. Remove the pin just as you come to sew over it.
When the three rows are finished, piece them one to the other using the same method. Press all of your seams together.

IMG_8906

Make a quilt sandwich! We went over this in our baby quilt and even though this throw is bigger, this sandwich is going to be even easier because we're going to tie our blanket instead of sewing it together. Still, make sure all your layers have been pressed and smoothed and pinned together with safety pins ever 6" or so.

IMG_8910 IMG_8912

Why tie? Well, for a quilt this size, I sometimes have a hard time wrestling it through my machine. I can always hand quilt it, but I don't want to worry about my stitches getting walked on or rolled in the dirt at the park. Tying is fast and keeps things where they should be. To tie your quilt, cut a yard of thread and put it through your needle. Start in the middle of your blanket and thread it through where the points come together. Take care to make sure that you're going through all the layers. Leave a 2" tail on either end and snip. Move on to the next point. Once you have our points tacked, knot your tails together. Keep tacking until you have knots every 4" or so (full disclosure-- mine are too far apart! I knowingly did this to get the quilt finished. Now I'm going back and continue sewing ties in between the ones that are already there which should space them out nearly perfectly).

IMG_9071

We are almost done. All that's left is to bind it up-- use your scraps and any leftover backing fabric after you've trimmed your blanket and sew a continuous strip of fabric at least 260" long (it sounds daunting, but once you get going you'll have a strip in no time). Refer back to part three of our baby quilt for links and suggestions on this one. Once you've bound one quilt, you'll quickly master doing it again!

This is such a fantastic gift for a Spring or Summer wedding. It's quick, handmade and filled with promise about all the fun the lucky couple is about to have.

Read More
Weekend Project: A Getting Started Project for Tiny People

(Reminder: we will be closed Monday and Tuesday of this week.)

IMG_6829
--Melissa

We tackled a baby quilt, but there are lots of other (and easier!) ways to show a new parent how excited you are to welcome a little one. Bibs were an essential part of our family entourage during the first year of all my boy's lives. I used them for bottle feeding and spit-ups long before we moved to all that soft food. Every so often one still gets stacked in with the napkins and someone ends up using one to their hands at the breakfast table.They are great to make en masse and then keep on hand to have give as baby having season approaches! 

The perfect bib (in my opinion) is: Cute (obviously), modern, soft, plastic and pocket-free, absorbent, and medium-sized. They are astonishingly hard to find in stores. I used the template from Amy Karol's Bend-the-Rules Sewing for this project, but there is a bib pattern piece in almost all the baby sewing books, including ones by Amy Butler and Lotta Jansdotter. You can sketch your own pattern piece or trace an existing bib you may own and like. Your pattern piece will fit from edge to edge on a regular 8 1/2" by 11" piece of paper. Sometimes I go a stitch longer, but paper-sized is a great guide to start with.

IMG_6800
I started with three fat quarters from Jay McCaroll's Habitat line. It is PERFECT for a project like this as it qualifies under the "cute" and "modern" categories as well as in the lesser known "not too precious" column. Look! Paint Spatters! Bring on the spaghetti sauce, Sir. Three fat quarters will be enough for SIX whole bibs. My favourite bib backing is terry cloth or towelling. You can cut up a still absorbent but slightly holey towel, or you can splurge and go for the wonderfully soft, organic terry we have at the store right now. I did the latter and bought an entire yard (we'll have an upcoming project that will utilize any leftovers). I like velcro/hook and loop tape for closures, because I always have some laying around. Snaps are great as well, and so are simple button and button-hole closures.

IMG_6801
So! You're ready to go. Place your terry cloth and print fabric right (soft) sides together. Pin your pattern piece in place and carefully cut out around your pattern piece. Take the pattern piece off, replace your pins (the terry can get a little shifty) and transfer to the sewing machine. Beginning a 1/2" inch from the edge and near the bottom corner begin sewing around the perimeter of your bib, backtacking at each end. Leave a 2" gap between the beginning and the end of your stitch line so that you can turn it right-side out.

IMG_6805
IMG_6808
Clip the seam allowance at the neck curve, and grade (trim) your seam allowance slightly around the closure ends.

IMG_6811
Turn bib right side out, using a pencil or chopstick to turn out all the curves. Press the bib completely flat, turning the edges of your fabric inward where you've left the bottom gap. Place a single pin keeping the fabric turned in and your gap even. Topstitch around the entire perimeter of your bib 1/4" away from the edge. Your gap is now closed! If you are nervous about topstitching an even, straight line, opt for a short zigzag stitch. It is very forgiving and cute-- when I look at all the bibs I made my first born, ALL my topstitching was some form of a zigzag.

Now you can adhere your snaps in place (you can buy snaps that come complete with their own min snap setter) or sew on your velcro. 

That took almost no time, right? You are going to be one heckuva shower gift-giver.

IMG_6825

Read More