Braided rug
By Hannah
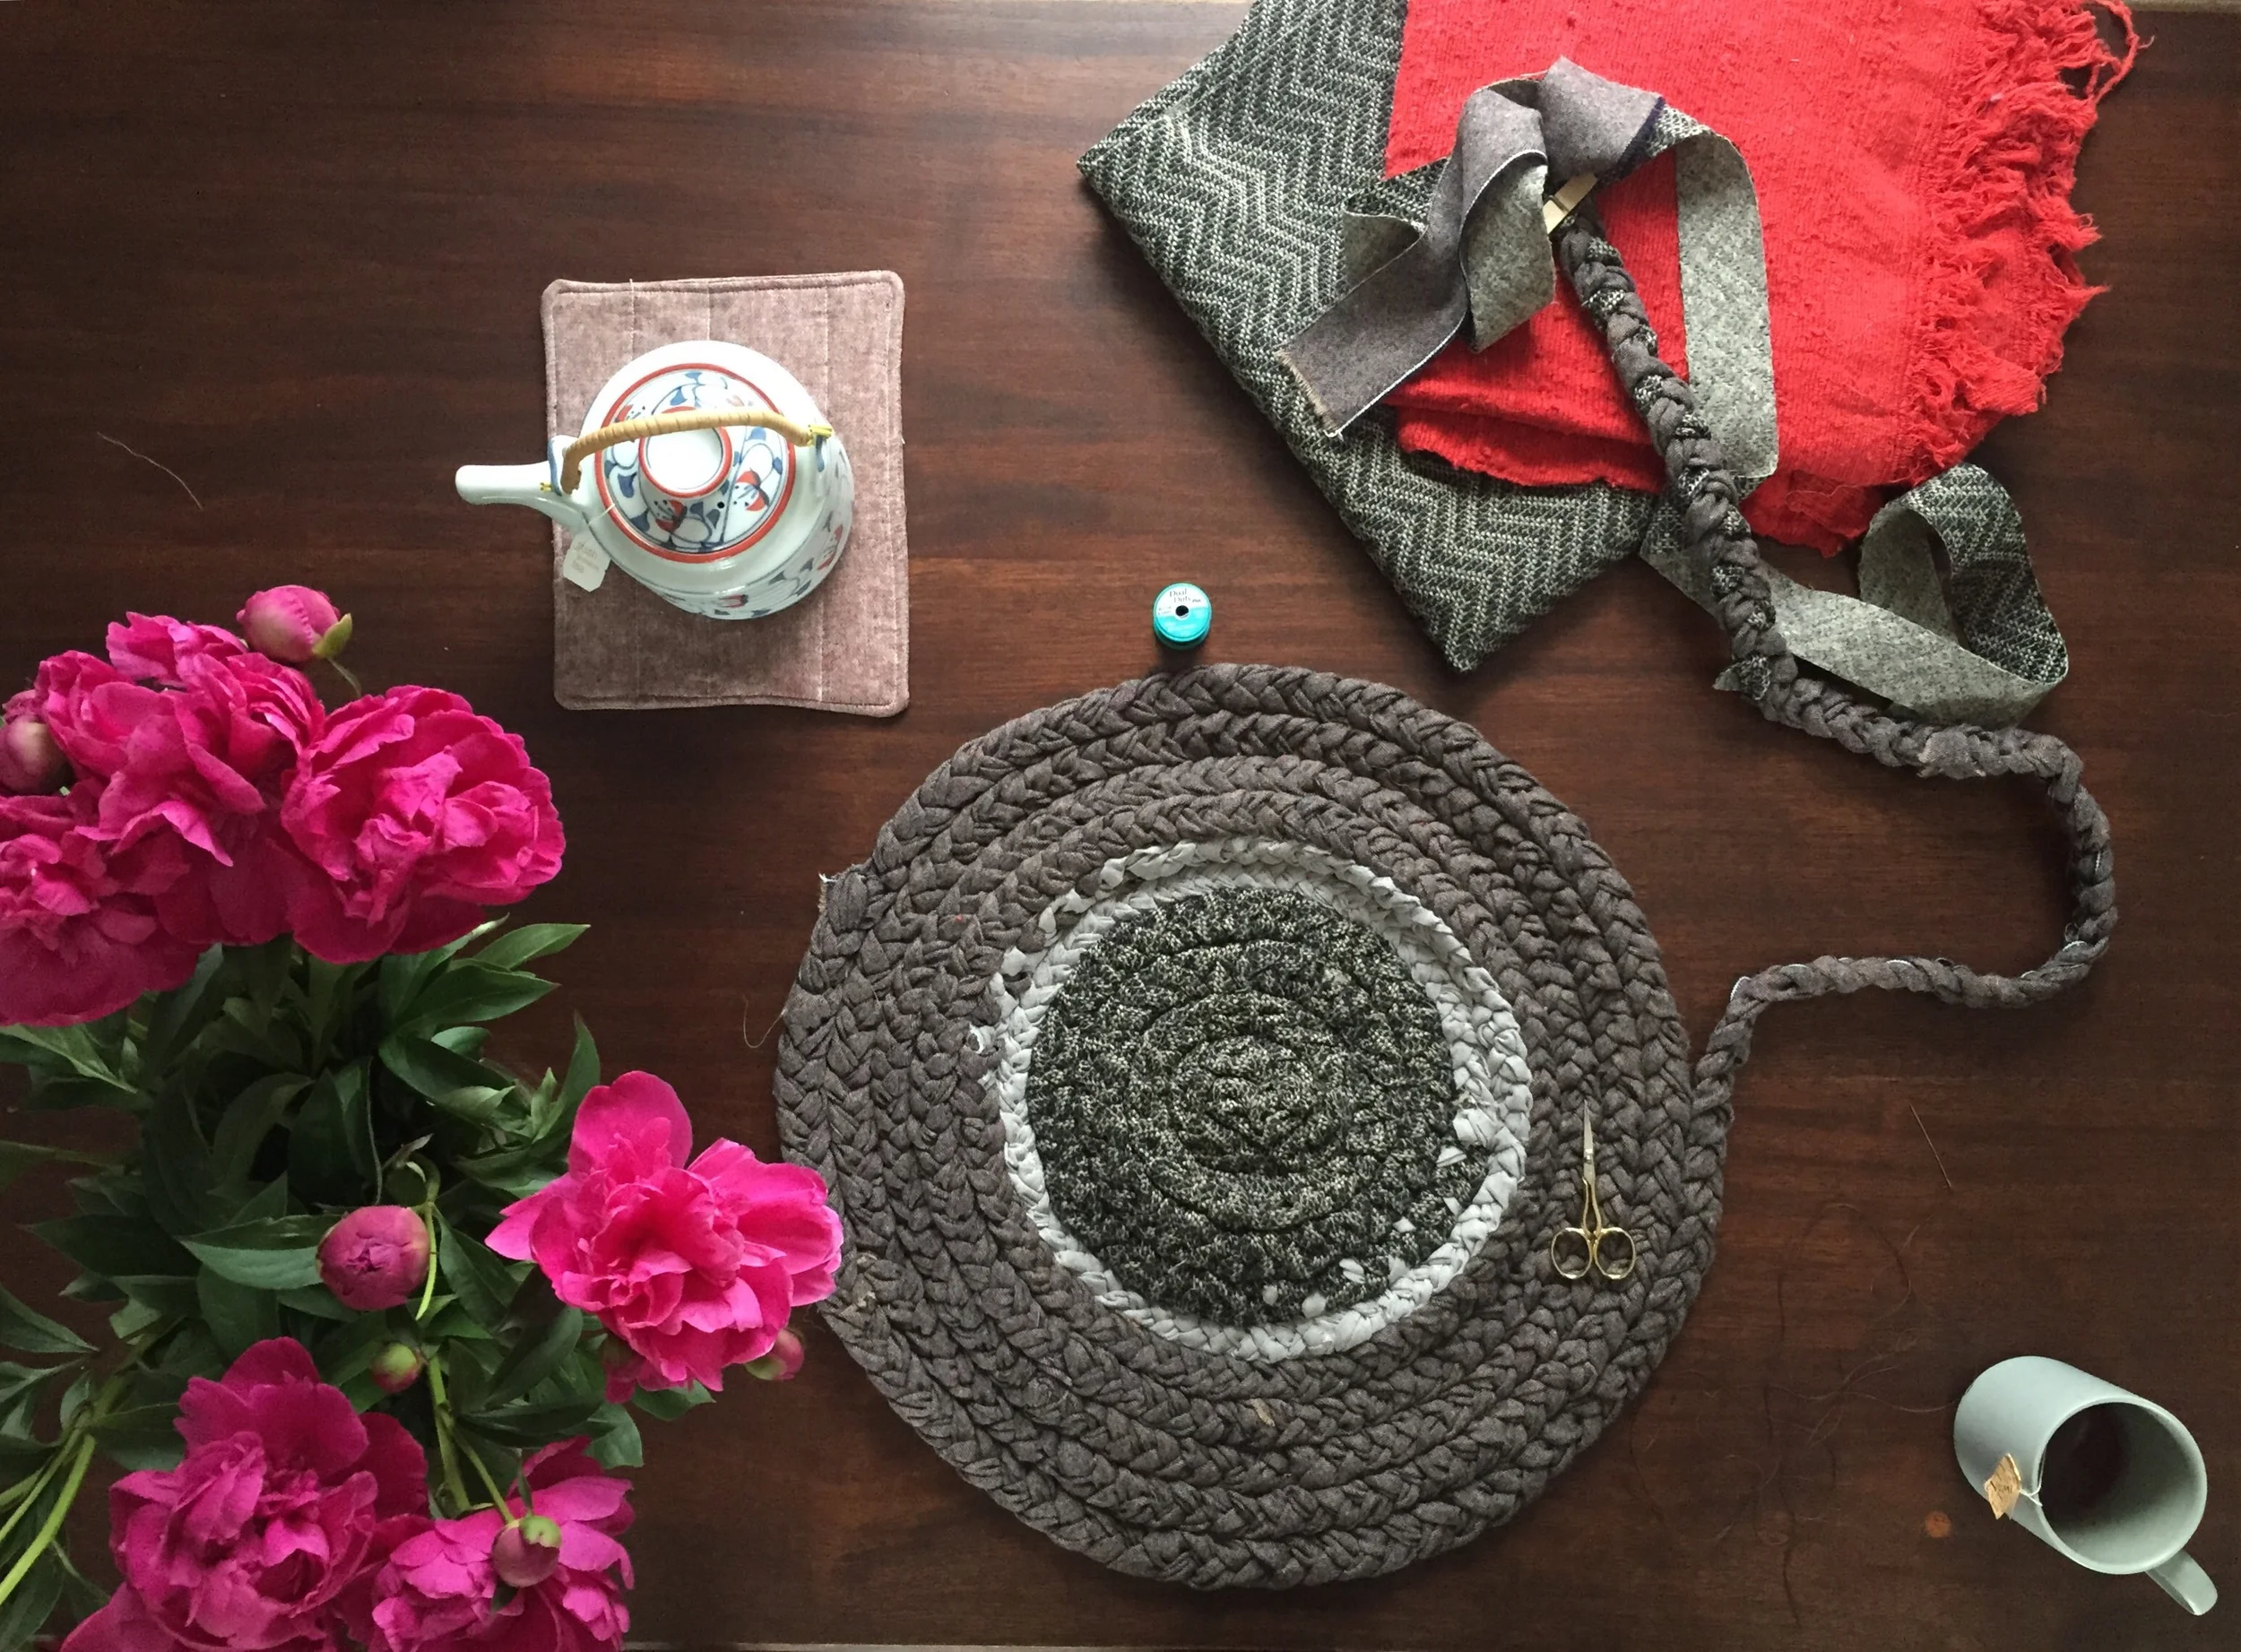
This rug consists of leftover fabric from recovering my couch and other scraps that I've been in love with too much to get rid of.
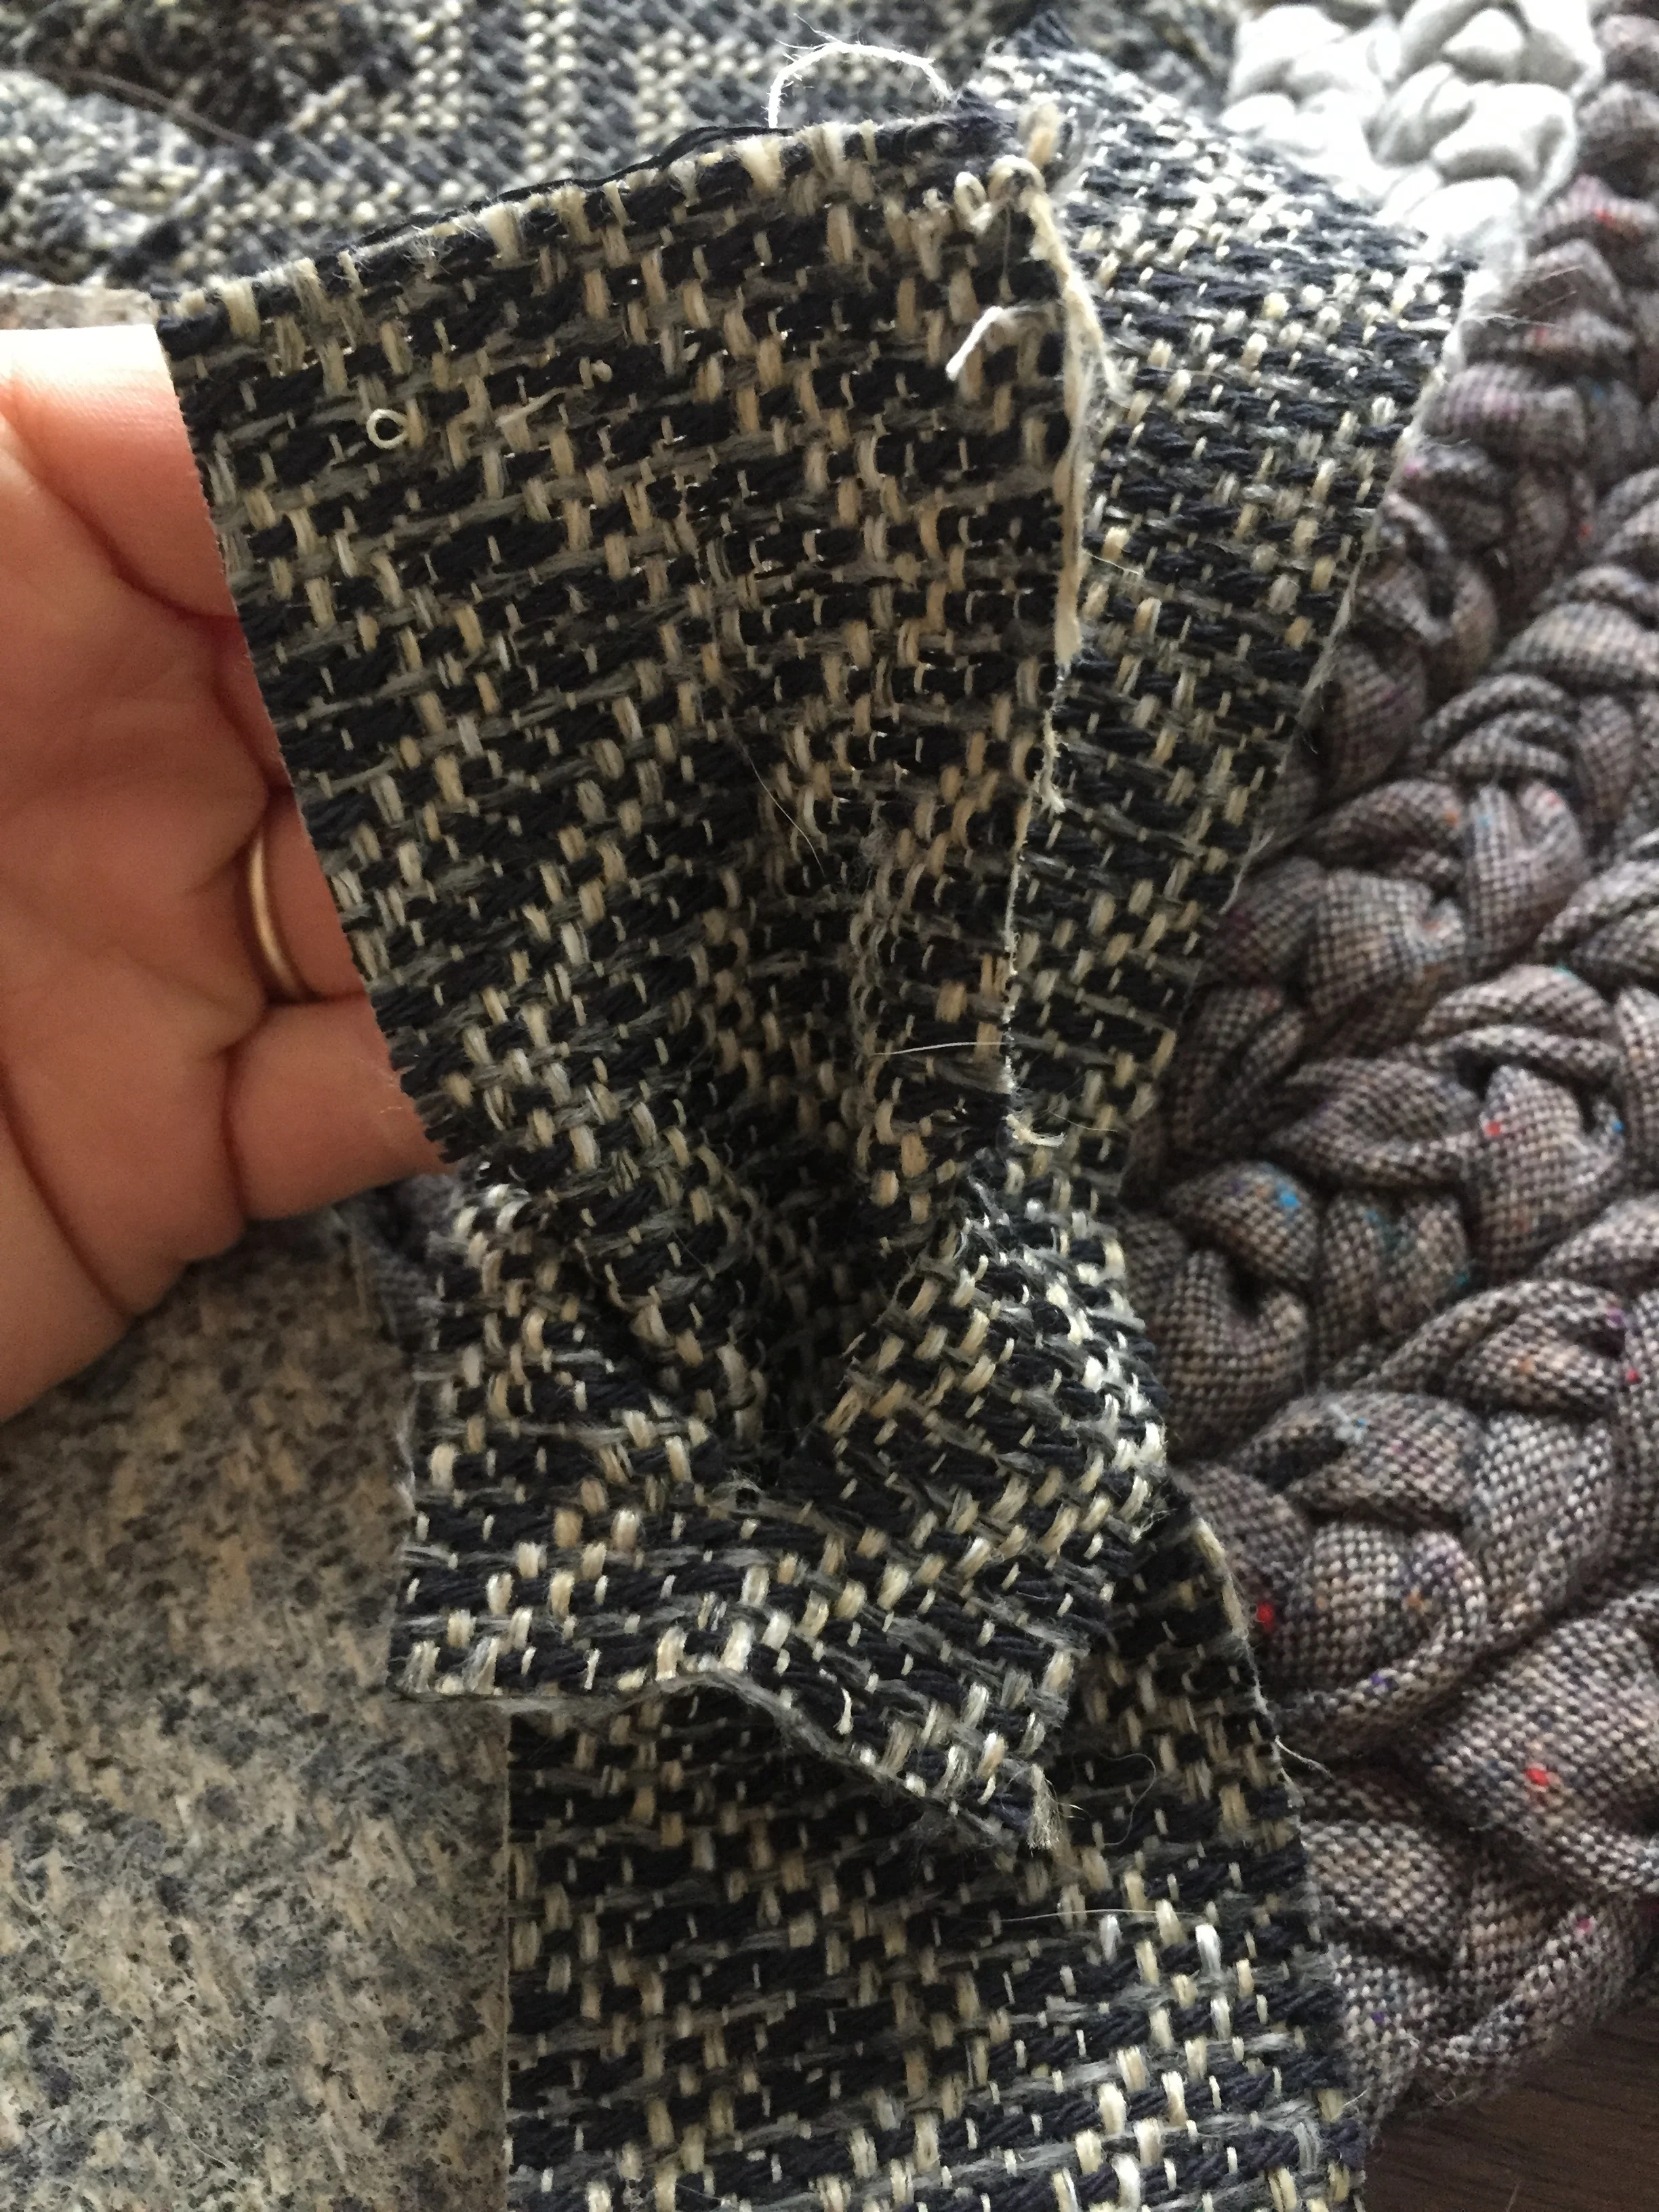
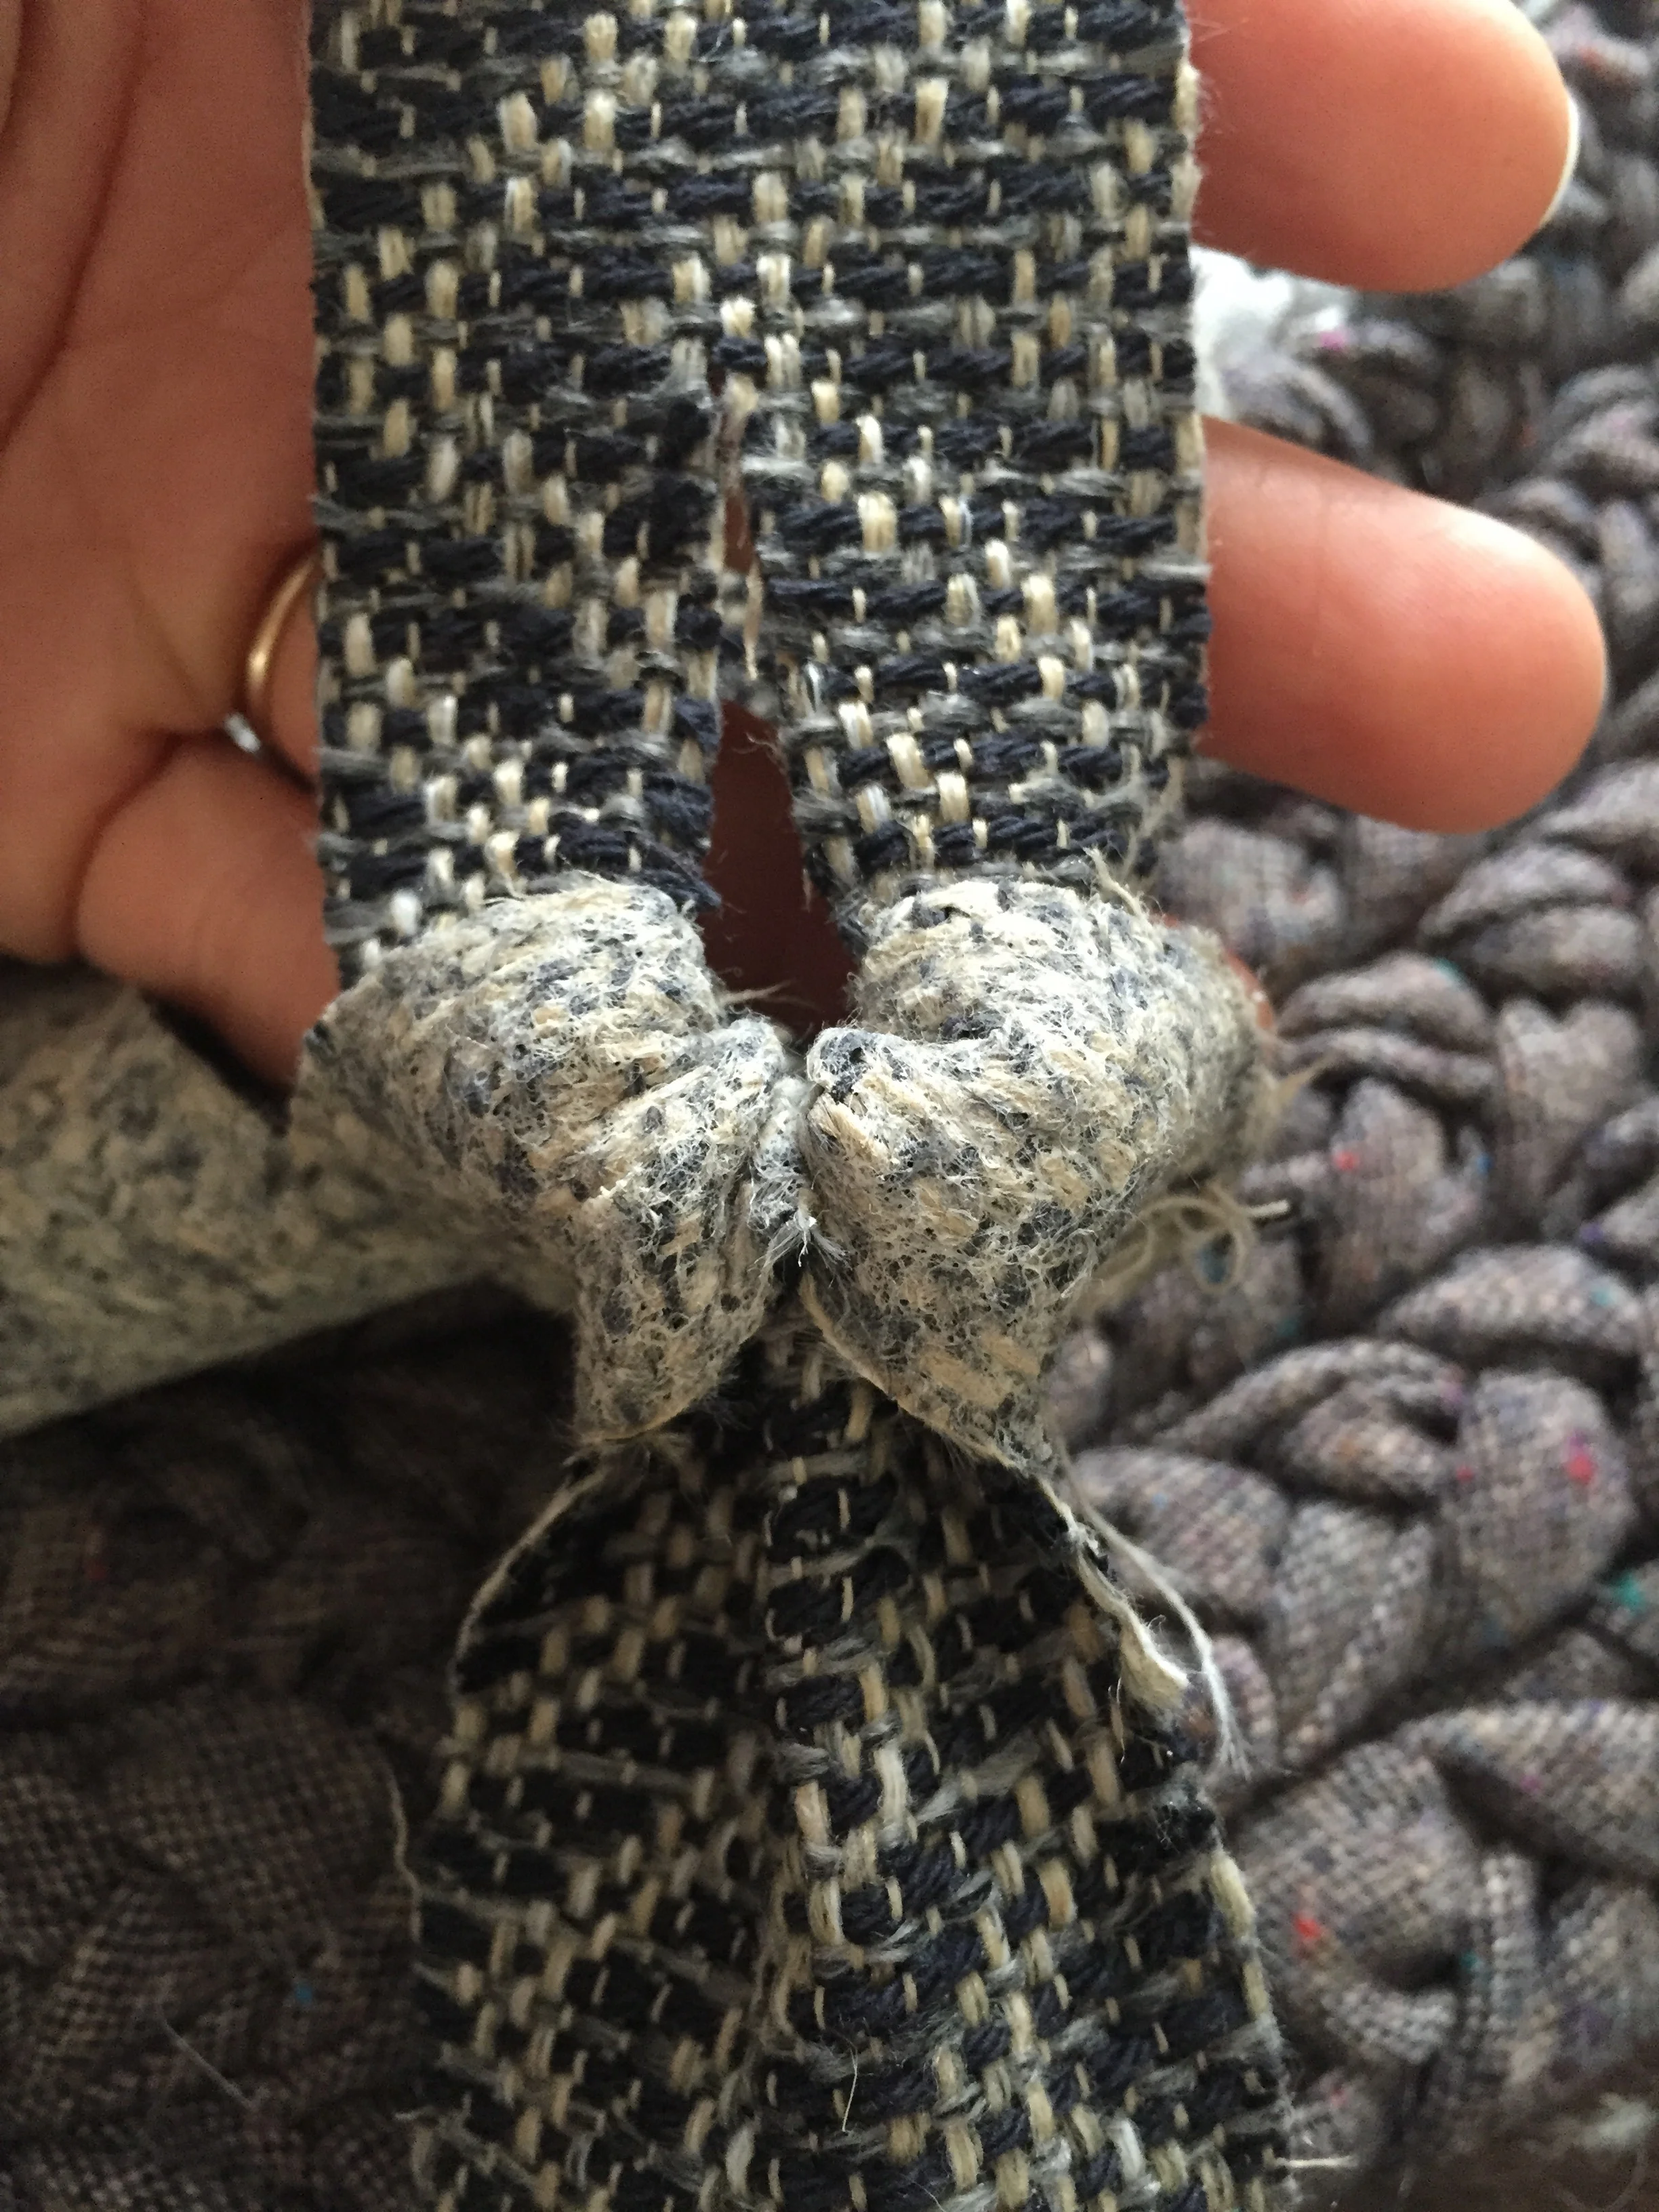
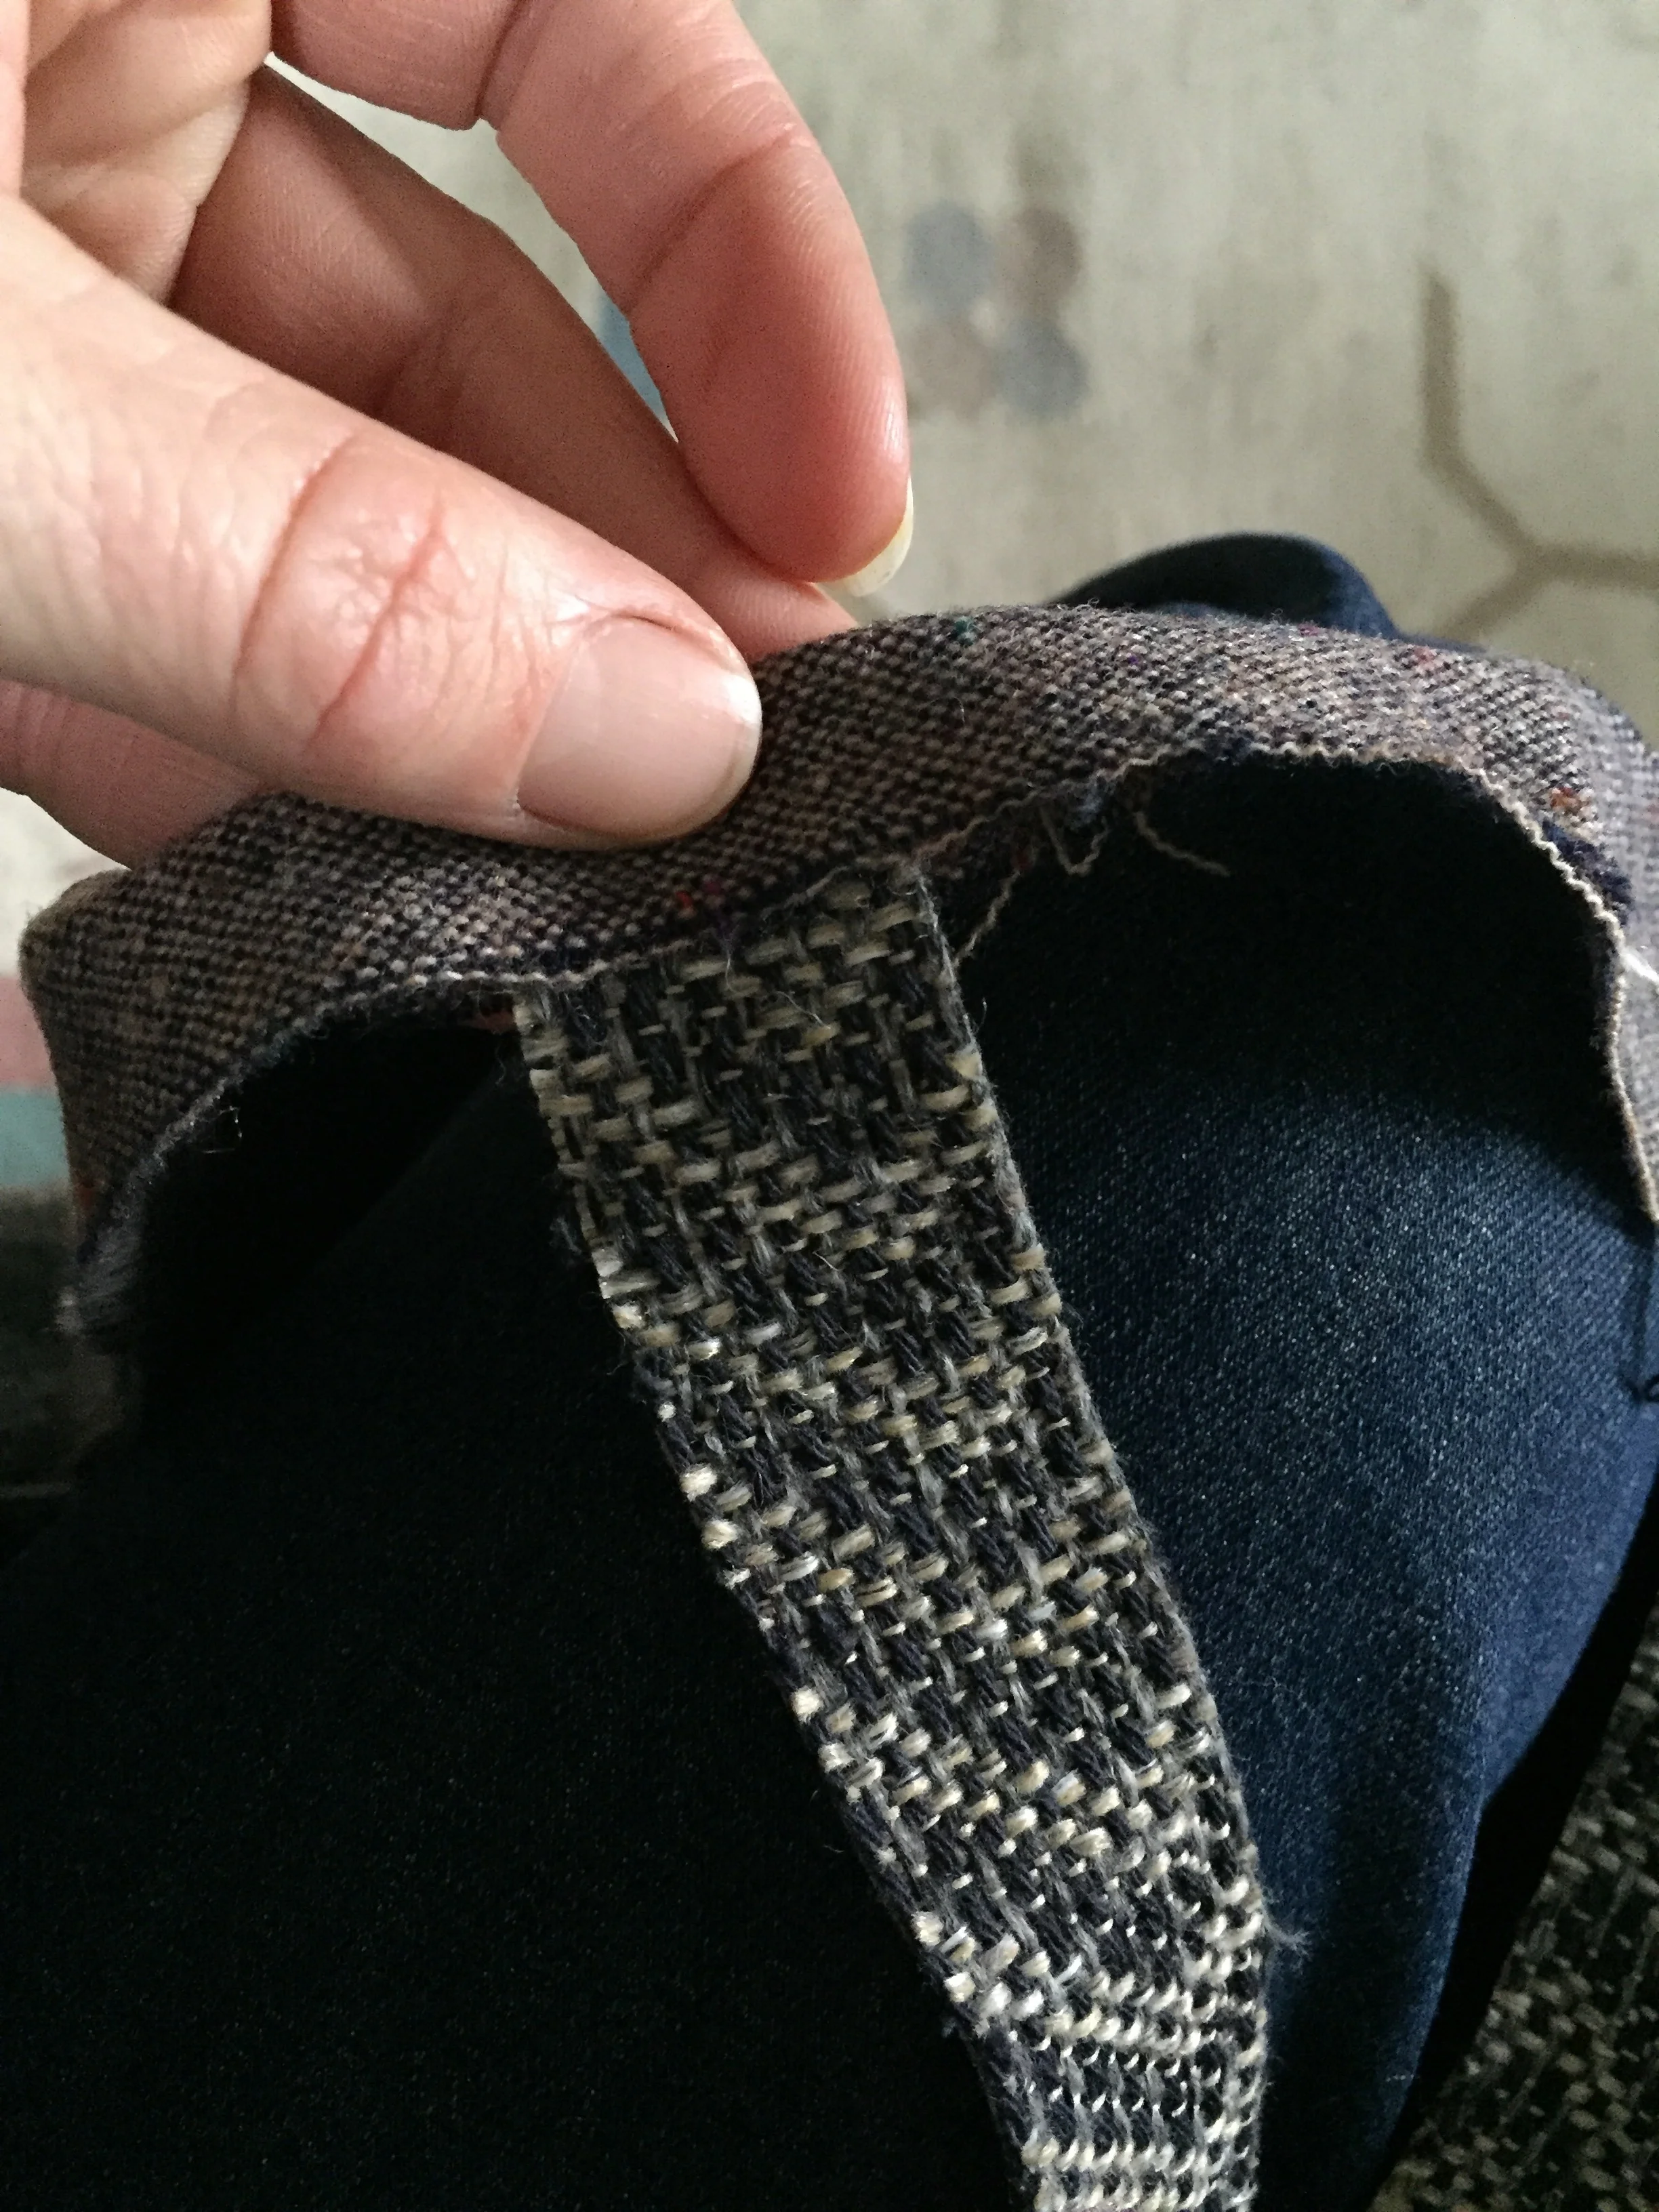
As promised here are some more in depth instructions on sewing a braided rug. After cutting 2" strips of your chosen fabric, cut 1 inch slit in both ends of every strip.
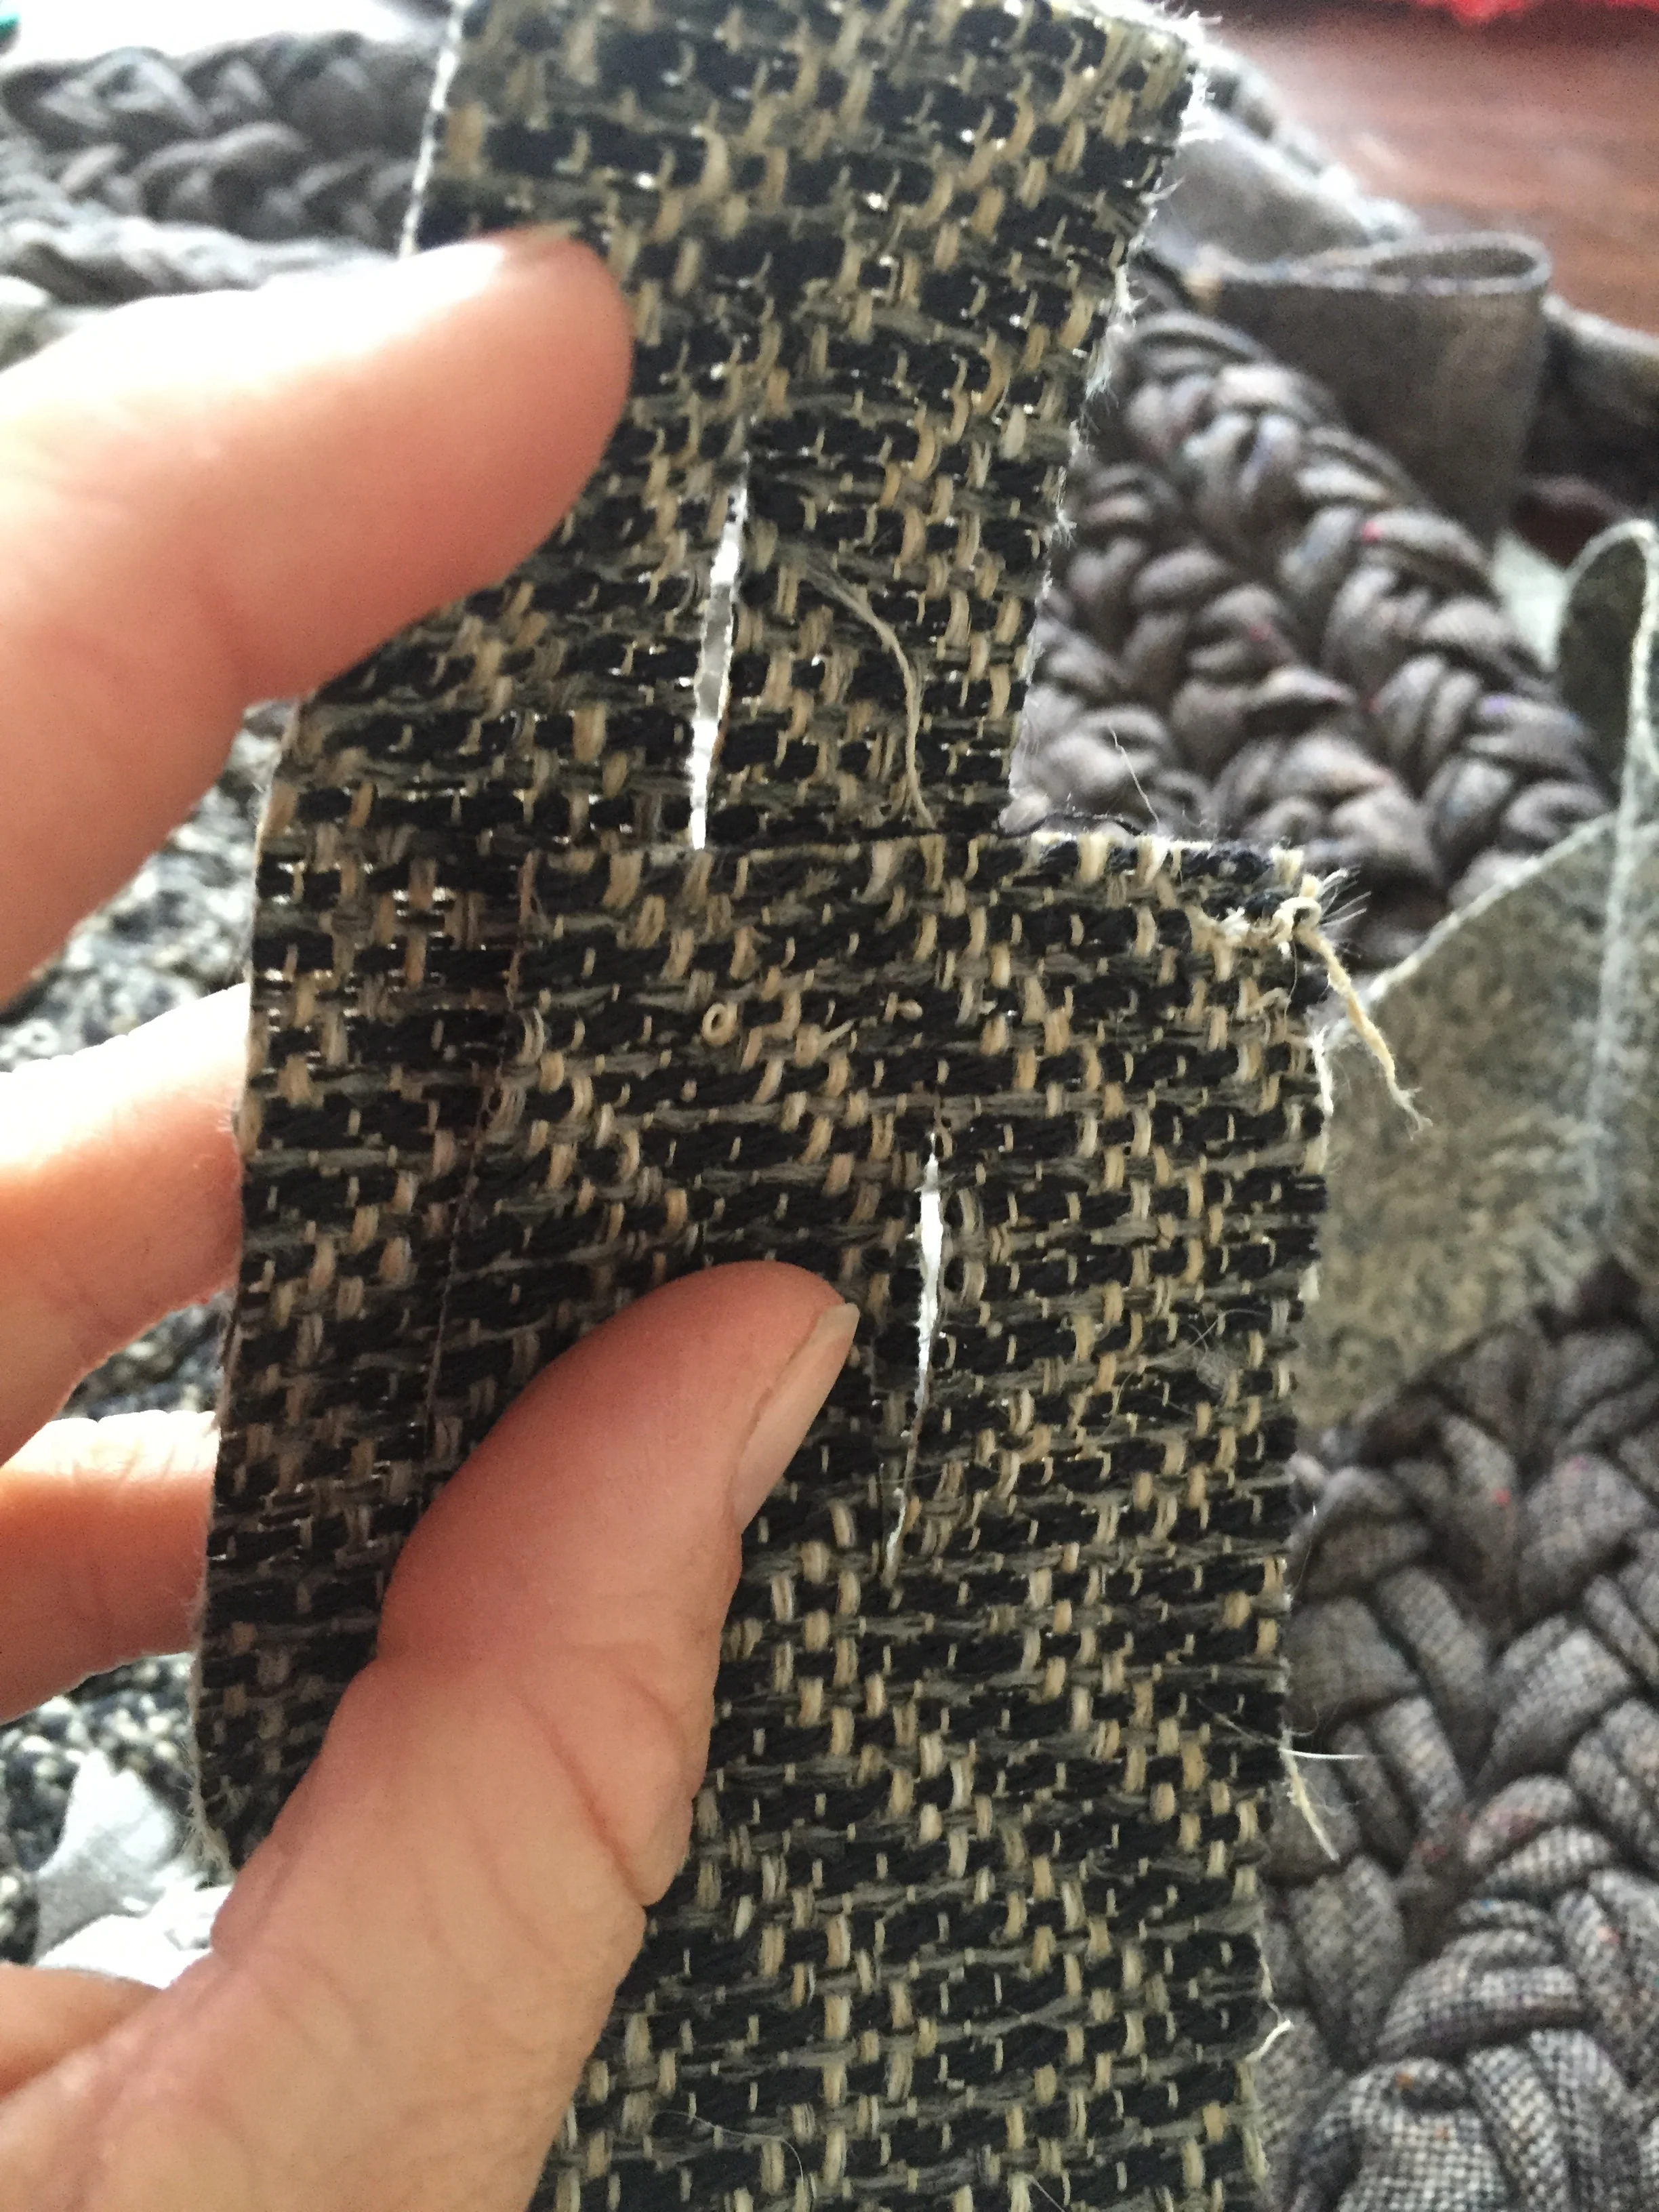
Now you'll slip one end in through the other end and then put the free end of the one you just slipped through the hole back through itself.
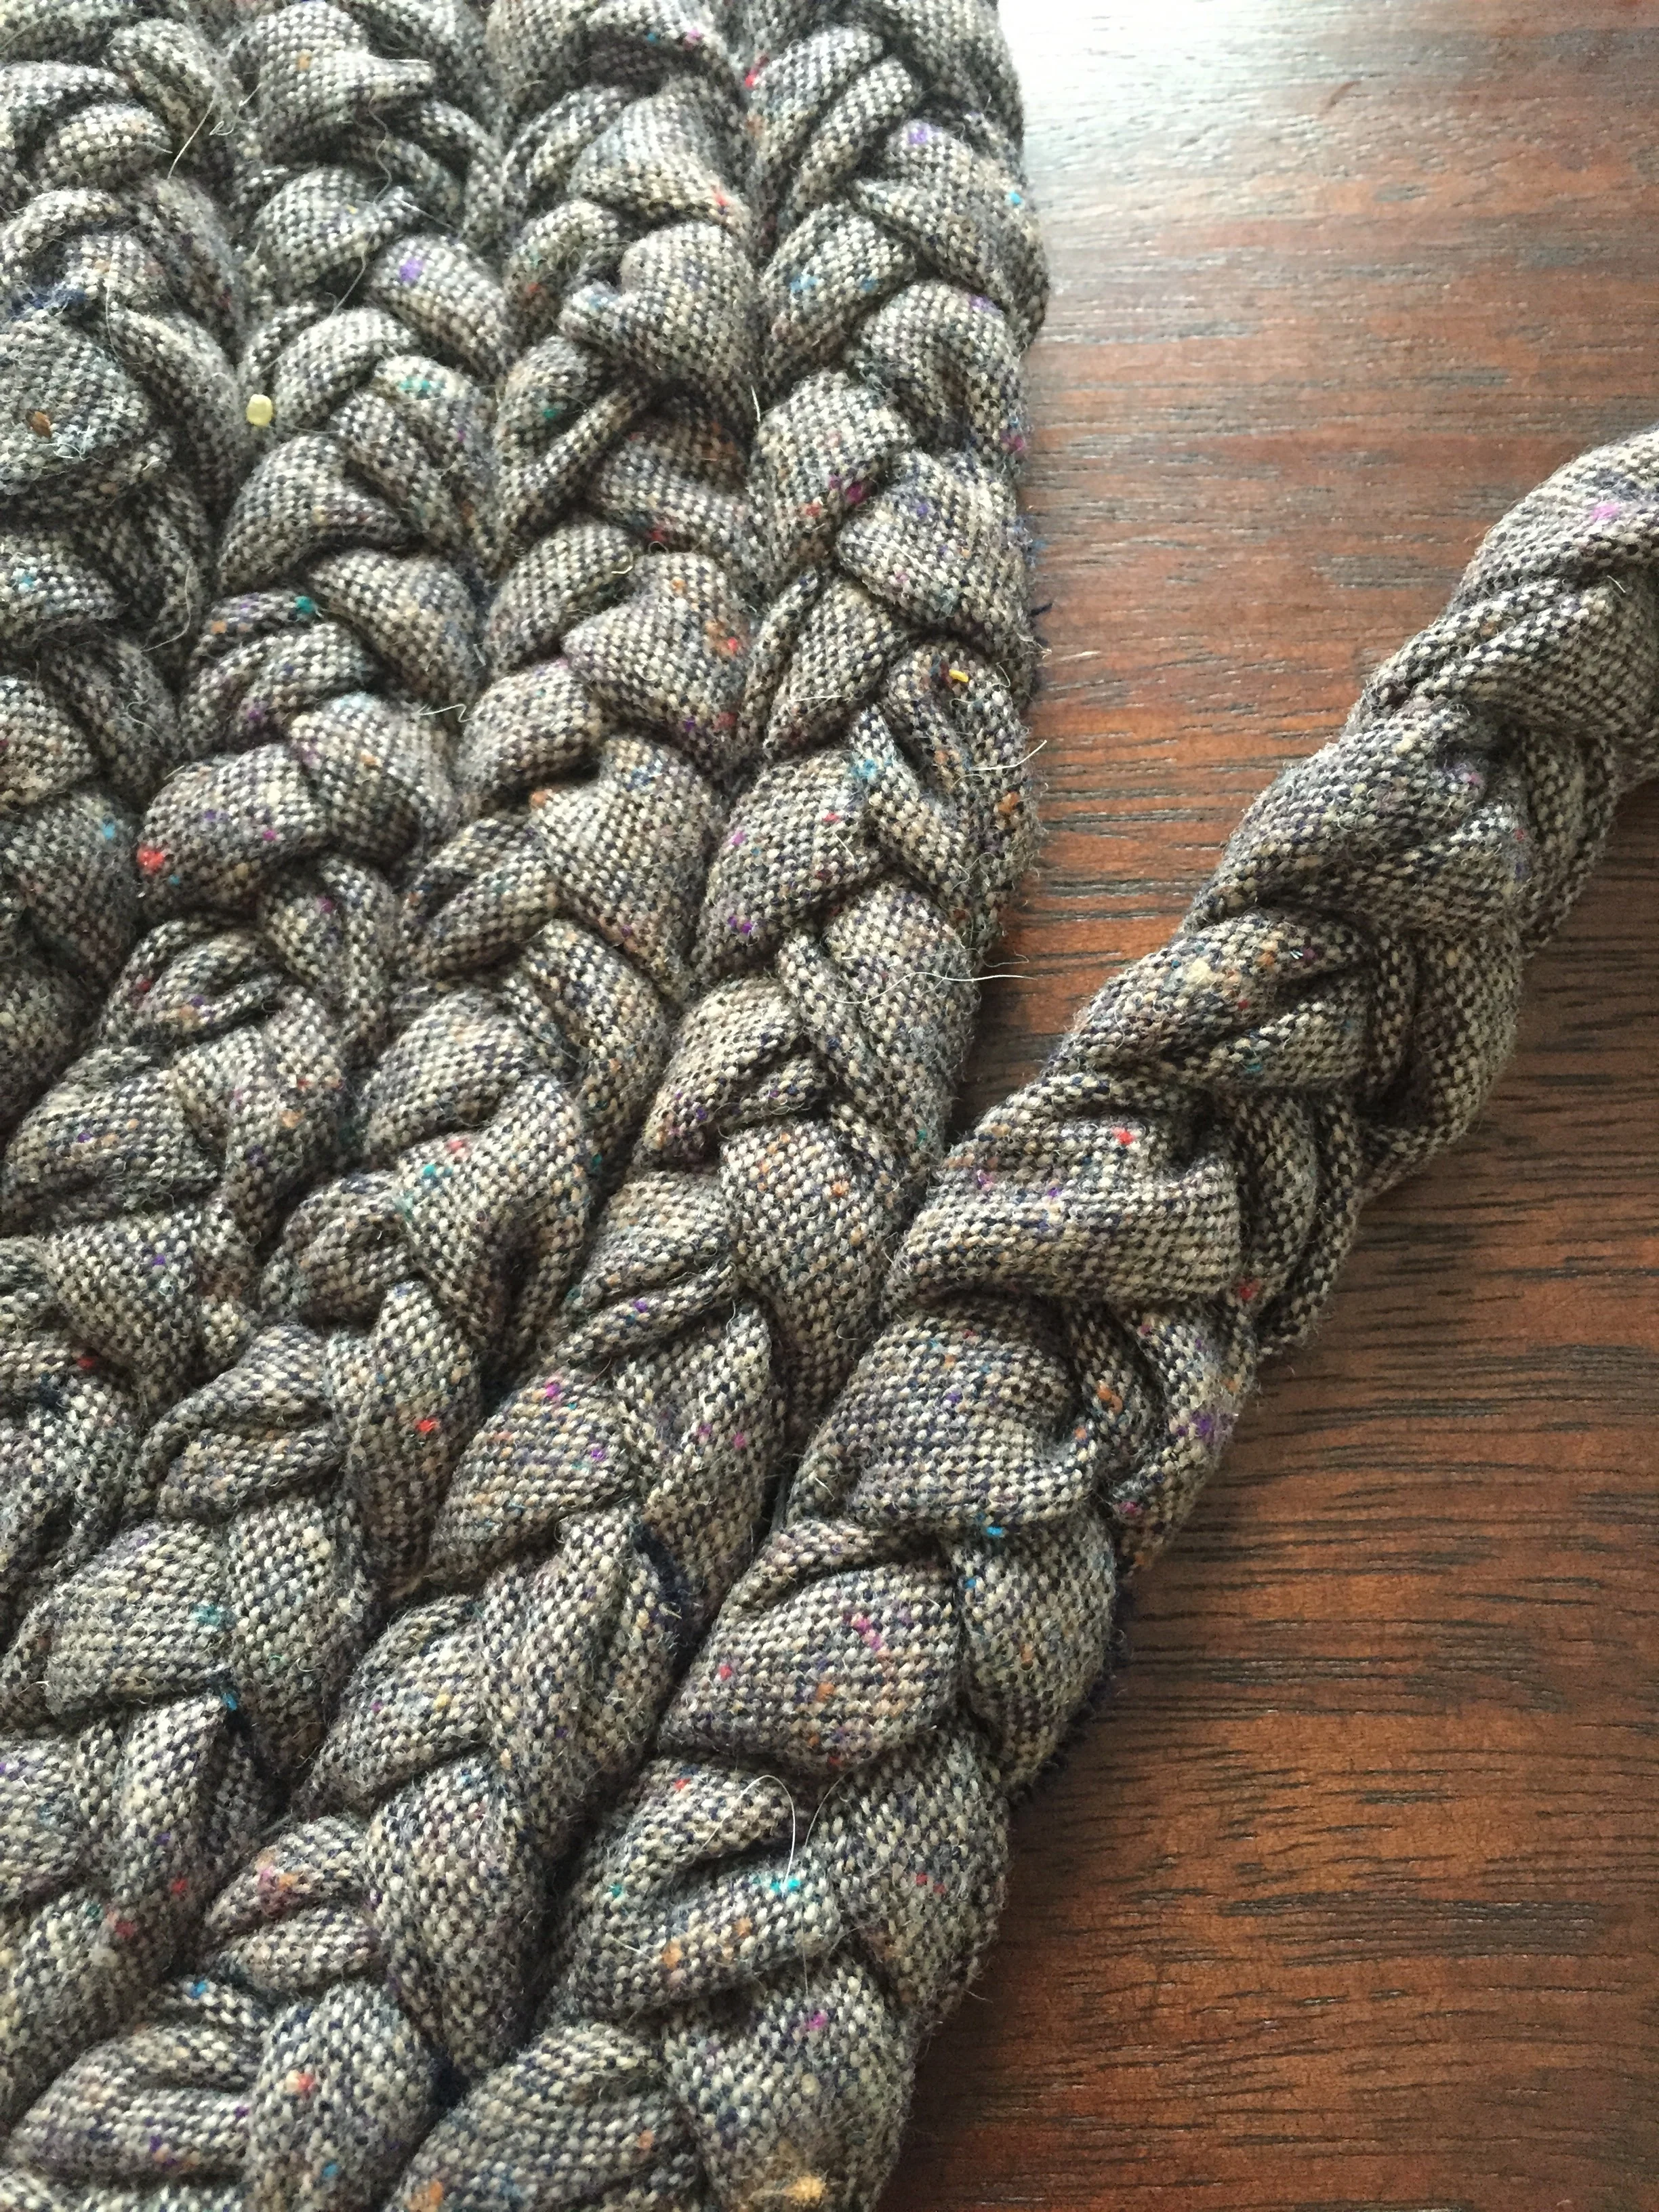
Next you will braid these together. The photo below shows how to start. Basically you will use two strips to start. Take one of the straps and fold it in half lengthwise. Make a mark for the center. Next fold it in half by the width. Take the end of the other strip and lay it flat in the center of your folded width. Stitch these together and start braiding.
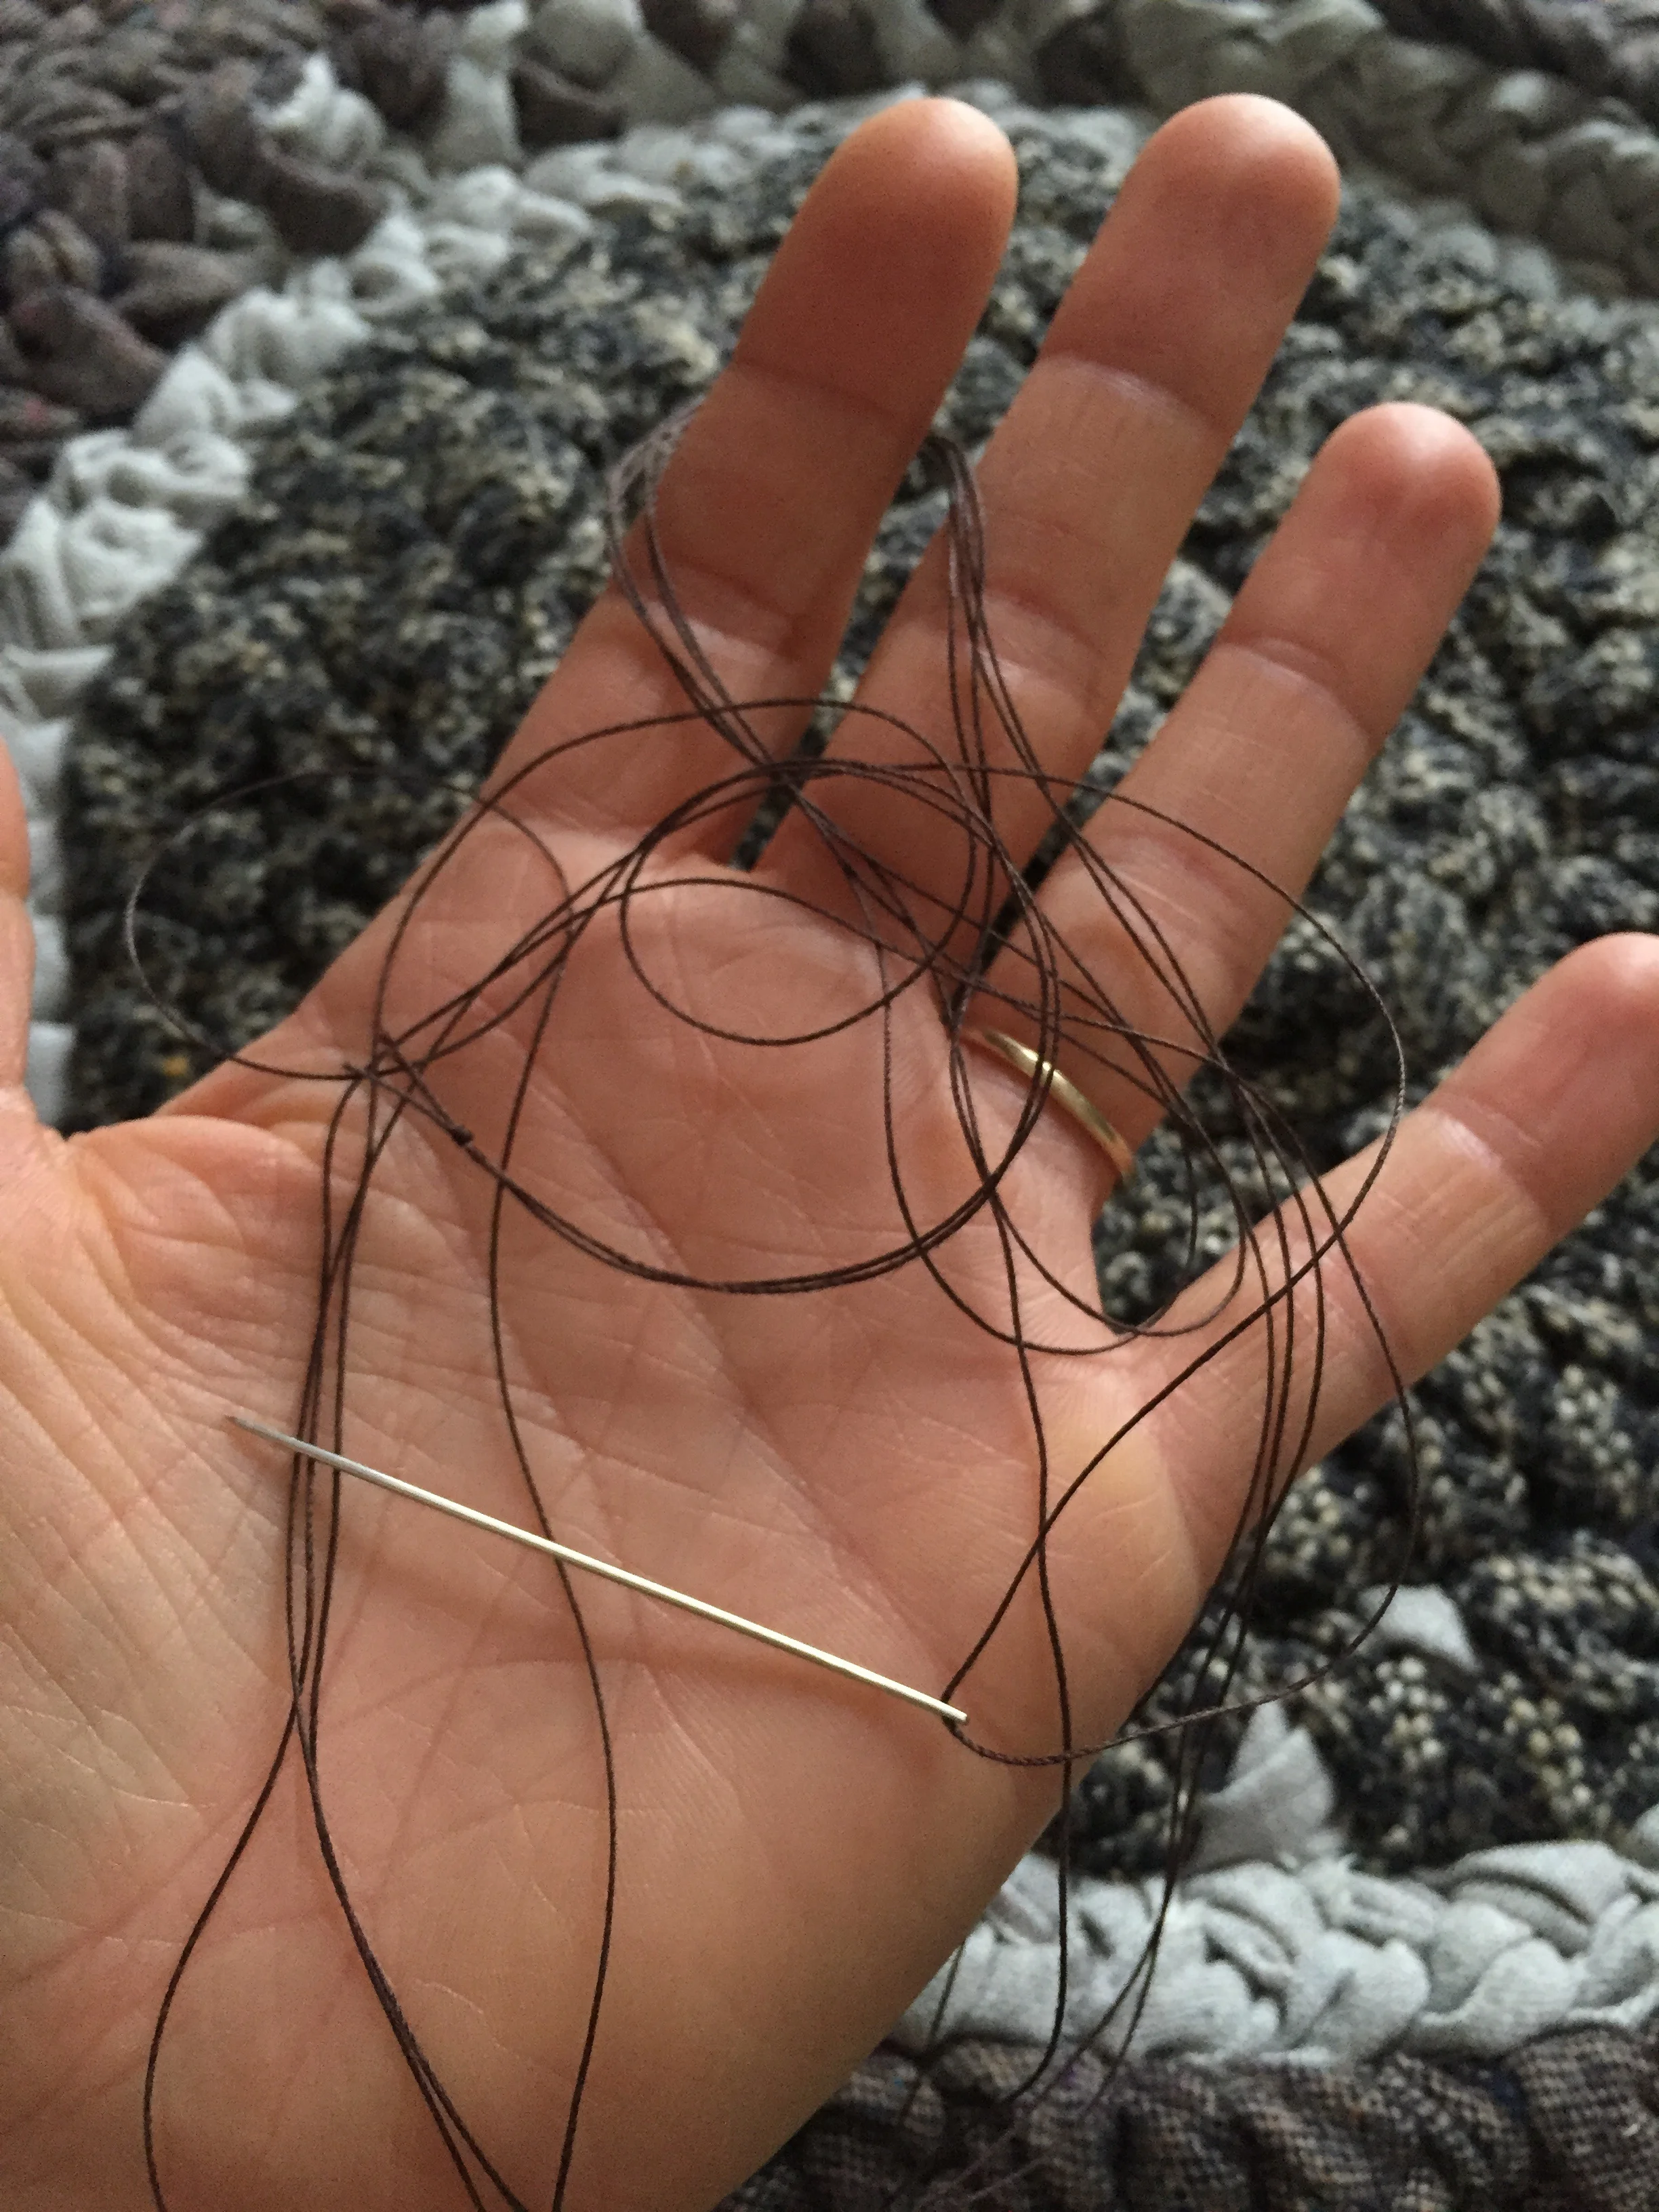
For stitching you'll need buttonhole thread. Make sure your thread is a length that you can handle. Remember, 'long thread lazy girl'. If your thread is too long it will knot and you will have to cut it and start over.
Work from the wrong side of the rug and use a ladder stitch to connect your rows. Make sure you don't pull your thread too tight or your rug will end up as a braided bowl. If your rug does end up with a bit of a bowl shape or any of the rows are not laying flat you can spritz your rug with water and set heavy objects on it for a week or more and the rug will start to lay flat.

This is a great project to work on while taking a long trip in the car or flying. Also remember that you can make this any size. Make a small one that serves as a trivet for your hot meals, medium size for a bathroom rug and even bigger for living room or dining room rug. Have fun!