Whole Cloth Quilting (A Gift to Give or Keep)

-- Melissa
Making a whole cloth quilt can be as simple or as complicated as you feel like you have the time for. Since more and more manufacturers are coming out with larger scale/cheater style prints and are printing them extra wide (I'm looking at you Kokka), you hardly need to take a scissor or even a sewing machine to them to make something beautiful and cozy.
I have recently declared that I am a horrible hand-quilter and only a very mediocre embroiderer. As I don't knit or crochet I've decided that I need to get much better so that I don't feel like such a lout sitting on the couch on the evenings with idle hands watching Mary Tyler Moore reruns. When I saw the tube bin fill up with beautiful cotton/linen blend prints, and noticed that Bolt had begun to carry #8 Perle cotton I knew that I had found a good evening project. There are loads of fabric options to consider, so to start your creative juices flowing I'll list what I used.
Supplies:
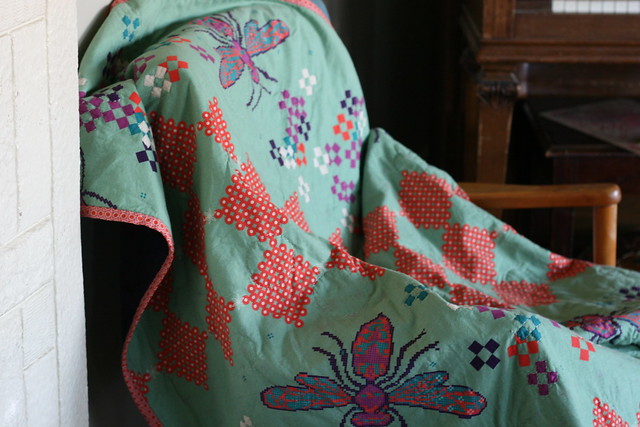
- 1 1/2 yards of Melody Miller's Ruby Star Spring. (I debated between this one and another lightweight Echino print I love). This is 62" (!) wide.
- 2 yards Free Spirit Voile. This is generally 54" wide.
- 7 yards of bias or straight cut binding. I used Anna Maria's new precut bias binding and it matches perfectly!
- Batting at least 64" by 56"
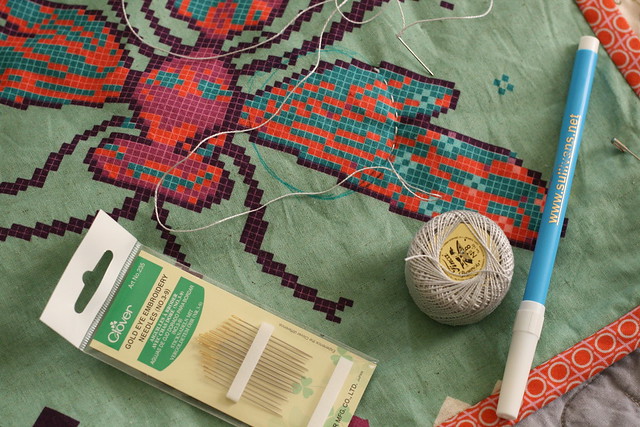
- Spool of Silver-ish #8 Perle Cotton
- Gold headed embroidery needles-- they need to be sharp, but also have a large enough head to accommodate the wider thread
- Basting thread or Safety Pins-- I purchased curved safety pins from Modern Domestic
- Optional: large embroidery or quilting hoop and a water soluble marker or other temporary marking tool. Thread Heaven.
Process:
This is the fantastic bit: you start by making your Quilt Sandwich! No piecing! Piecing does not a quilt make-- it's the actual stitches or ties that keep the whole thing together that qualifies it as a quilt. We've talked about sandwich making before so I'll refer you back to this post. I used curved safety pins to hold it together together. Trim off the excess backing fabric. As I was fairly certain I had a pretty tight sandwich and that I would be hand quilting/embroidering it together (which is more forgiving than machine sewing for dealing with wrinkles), my next step was to Bind the Quilt. What? Yes. I bound it using my sewing machine to sew it on, and then regular cotton thread and a sharp needle to hand tack it down.
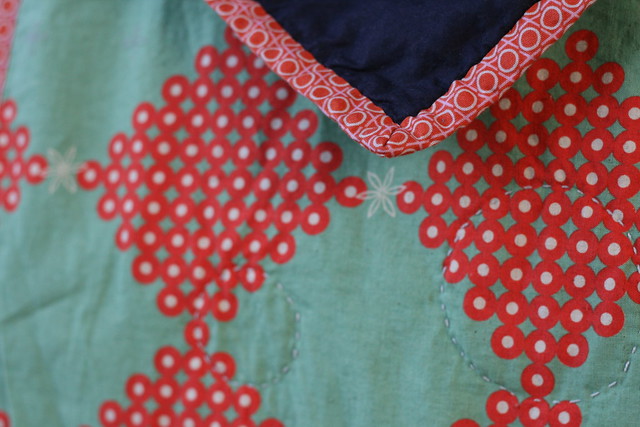
Feel free to work free hand with your quilting or follow the outlines or design of the print your using. I used a water soluble pen to mark the top with circles and then followed the large pixel-shaped printing to make the Xs. The perl cotton glides through the fabric really well. Aided by thread heaven, it goes even easier. The X and O stitching imitates the print on the binding and it makes for lots of pretty contrast stitching on the back.
Final step: Wash and Dry your masterpiece. I didn't pre-wash any of my fabric, preferring it to scrunch up a bit after it shrinks a little bit in the dryer.
You are Done.
In no way are all my stitches even or without mistake, but it was a pleasure to curl up under this quilt every night and get to stitching on my couch. This would make a wonderful holiday/wedding/birthday gift. The voile is so silky and the cotton/linen blend washes up very softly. But don't let that limit you! Check out the soft and even warmer wool stocked in the store right now. I've already picked out fabric to start a new one.